Very often, the requirements and style of each game differ from one another. Nova provides powerful administrative tools right out of the box to allow a game's management team to customize various settings and basic pages for their game.
Tip
For the purposes of this walkthrough, we are assuming that the process is functioning exactly as intended by Nova's unaltered installation.
Permissions
To edit any setting in Nova, you must have at least the System Administration access role, or your access role needs to have the appropriate setting management (such as Site Settings, Site Messages, etc.) feature(s) enabled. Typically, this feature is reserved for those who are managing the game.
Settings
In this section, we will focus on establishing the basic parameters for your game's functionality, including your game's name, email settings, timezone, and appearance.
To access your site's settings, access Nova's control panel and locate Settings under the subheading Site Management. From this screen you will have access to:
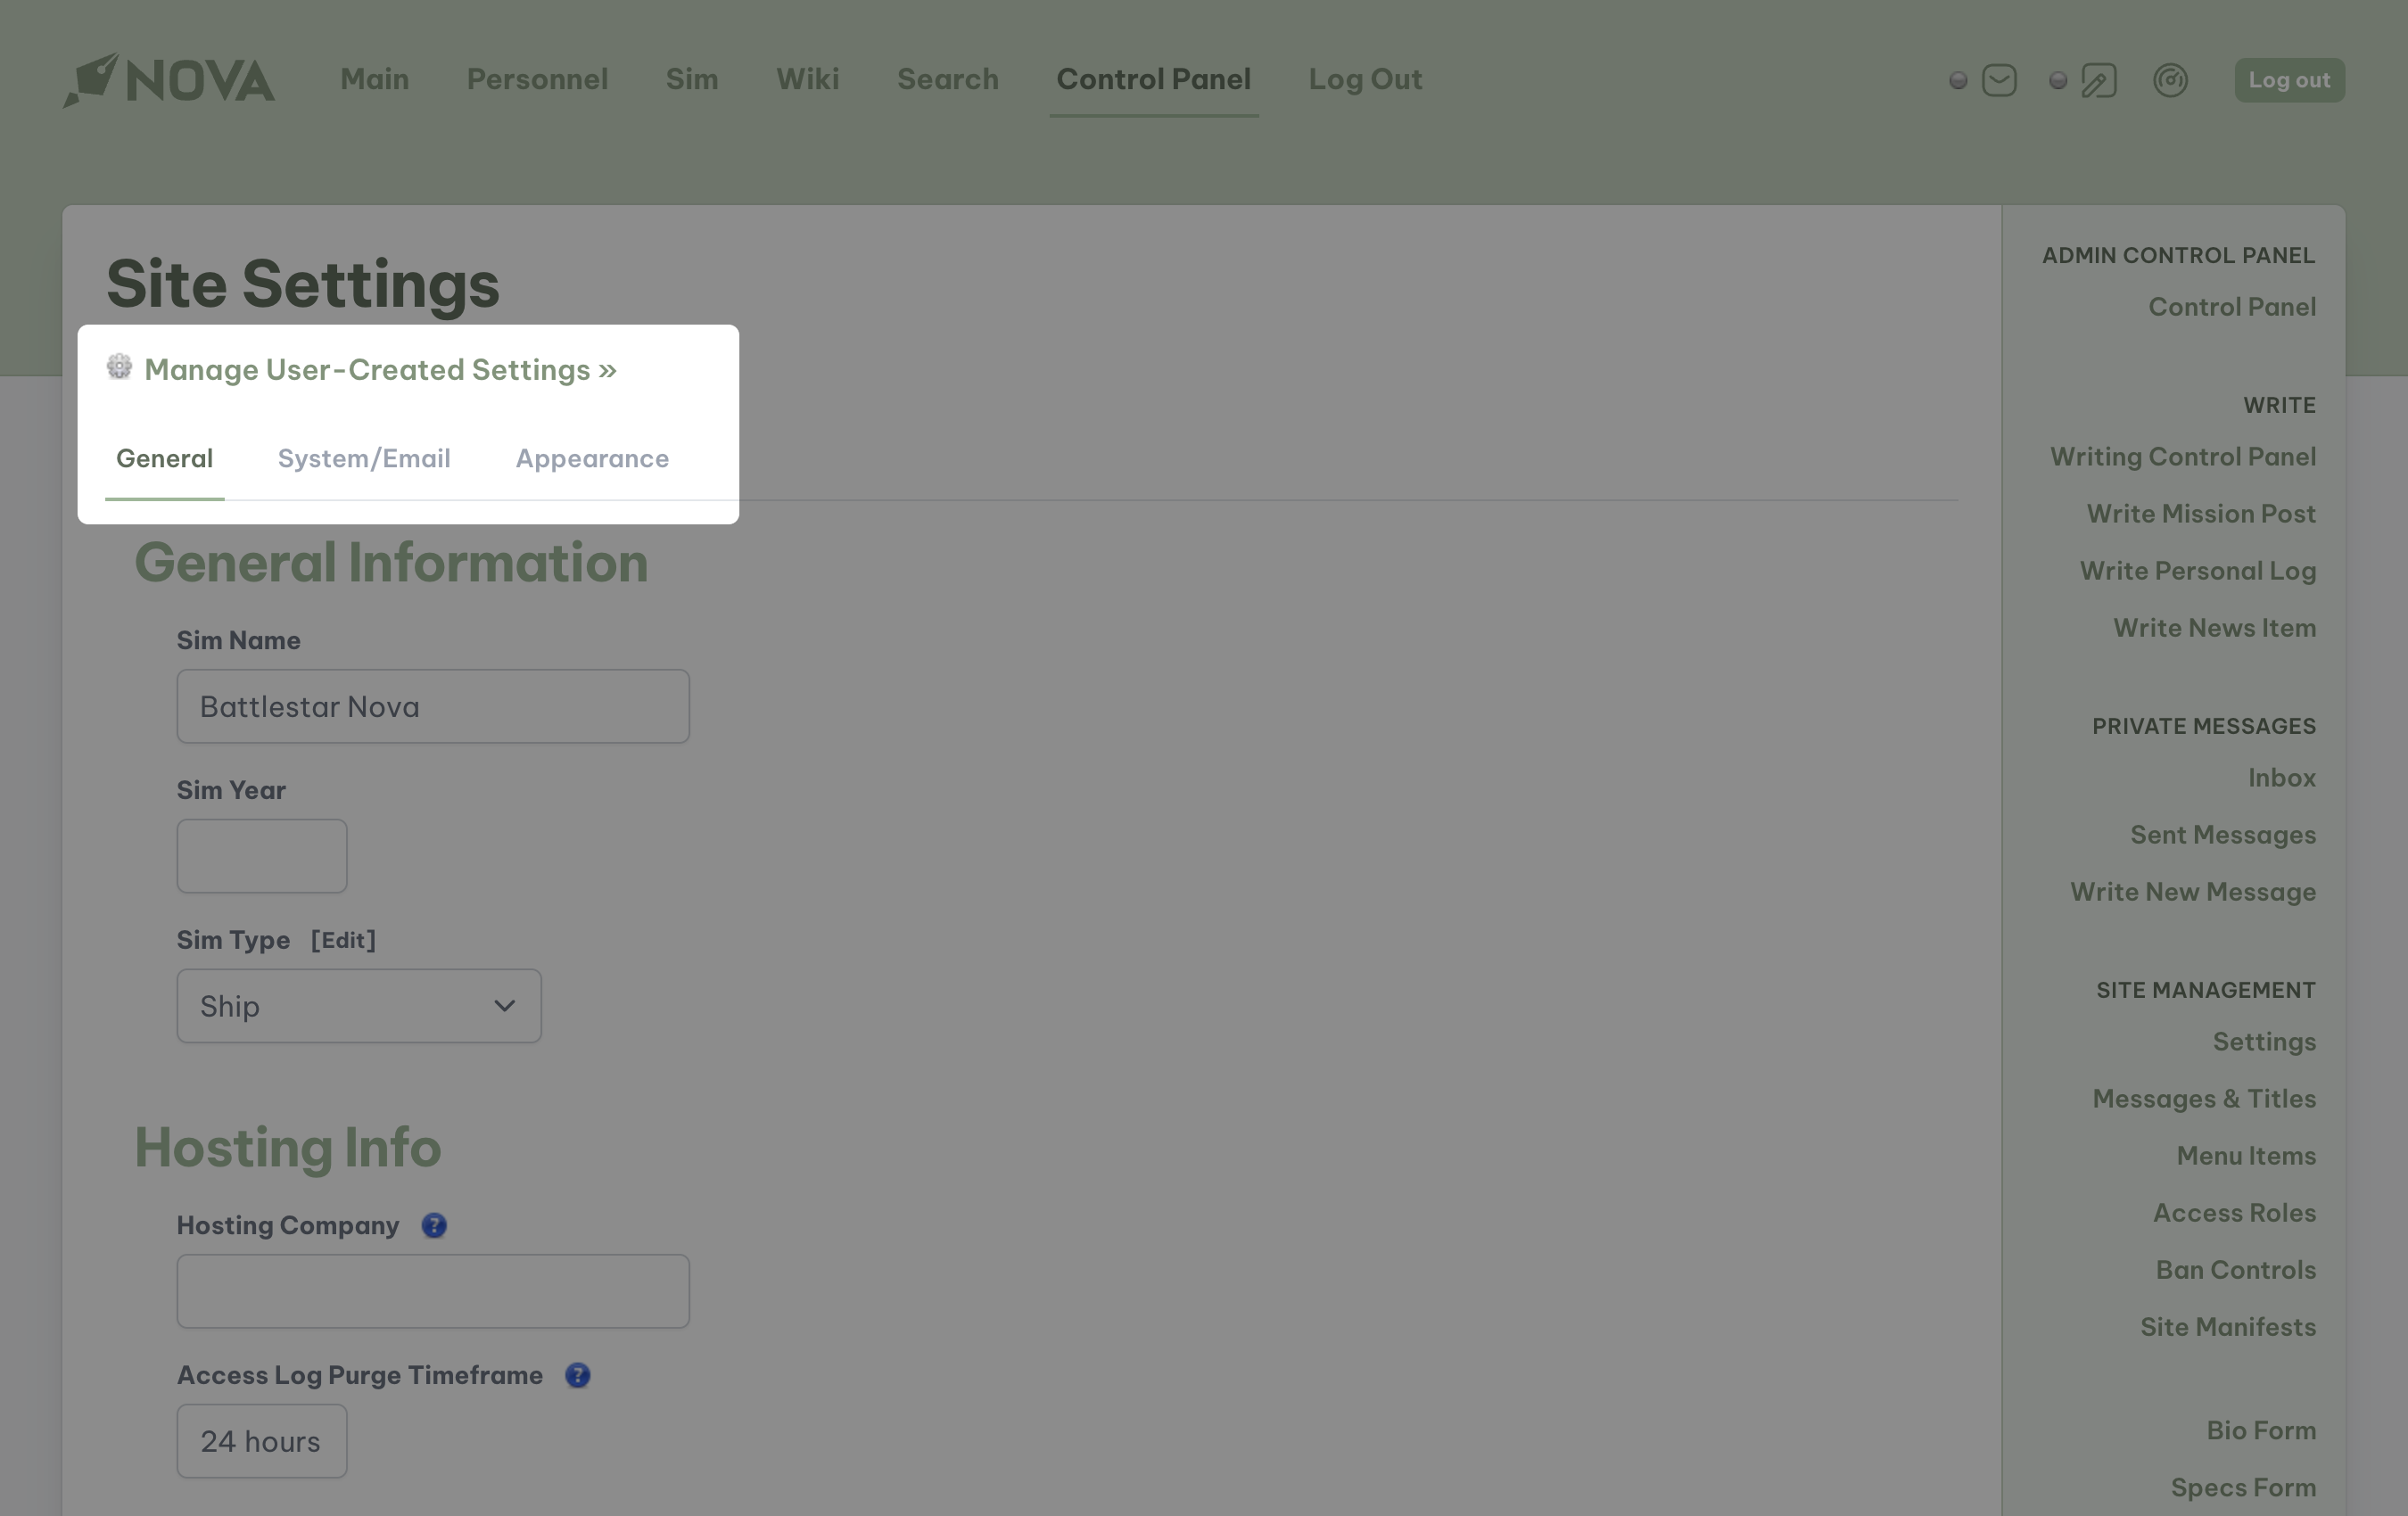
- Manage User Created Settings: an advanced feature that enables you to create settings for various extensions and alterations to Nova's structure.
- General: basic settings for your game such as its name.
- System/Email: settings that are related to system upgrades and maintenance, as well as email operations and basic user requirements and restrictions.
- Appearance: managing the basic look and feel of your site.
Editing general information
Under the General tab, the following options are available:
- General Information:
- Sim Name: the name of your game, i.e. USS Enterprise.
- Sim Year: the year in which your sim is based, i.e. 2373
- Sim Type: a dropdown selection that enables you to select the type of game this is, such as Ship, Base, Colony, etc. Based on your game's type, available menu options will change as well as other settings throughout Nova.
- Hosting Info:
- Hosting Company: to comply with the various digital privacy laws around the world, such as GDPR, we need to provide the name of the hosting company that we could have potentially shared user data with. You will need to enter the full name of your hosting company which will be inserted into your site's privacy policy.
- Access Log Purge Timeframe: in addition to the above, you will need to find out from your hosting company how often the access logs are purged from their system. Once you have that information, please enter it here.
When all edits are complete, select Submit.
Adjusting system and email settings
Under the System/Email tab, the following options are available:
- System Settings:
- Maintenance Mode: this toggle switch will enable or disable maintenance mode on your site. When enabled, only those with System Administrator access will be able to log in and make adjustments to the site. This feature should only be used during major events, such as updating Nova's codebase and files, or migrating to a new host.
- Update Notification: select how often you would like Anodyne Productions to notify you when a new version is available. These notices will not be emailed, but a notification will appear in the overview section in Nova's control panel.
- All Updates: be notified at any time when any new version is available.
- Major Updates Only: be notified only when a new major version, such as 3.0, is available.
- Minor Updates Only: be notified only when a new minor version, such as 2.7, 2.8, etc., is available.
- Incremental Updates Only: be notified only when an incremental update is available for your current version, such as 2.7.2, 2.7.3, etc.
- No Updates: this will disable all notifications that a new version is available.
- Date Format: customize how you would like the current date and time (not the Sim Year) will appear throughout your site. You can select from prebuilt options or create your own.
- Timezone: select the primary timezone under which the site will operate. This defaults to Greenwich Mean Time.
- Daylight Savings Time: select whether or not your site will observe Daylight Savings Time in the selected timezone.
- Number of Allowed Playing Characters:: select the number of Player Characters each player can have while participating in the game.
- Number of Allowed NPCs: select the number of attached Support Characters each player can have while participating in the game.
- Who's Online Timespan: determines the time period in which Nova considers an active player as being online. The longer the timespan, the more processing power that will be required from your host.
- Posting Requirements: the timespan in which players must publish a post before which they could face potential disciplinary action from the management team. If you do not want to establish requirements, please enter 0.
- Post Participants: enabling this option will allow Nova to remove any player and their characters who did not participate in a post as the final version is being published and emailed to all players.
- Email Settings:
- System Email: select whether or not your Nova installation is authorized to send emails to all players, including notification of private messages, published and saved posts, and more.
- Email Subject: enter the text information that will be entered before any subject headings on emails sent to your players. This defaults to [%Sim Name] such as [USS Enterprise].
- Default Email Name: enter the name that you would like Nova to deliver email as, such as USS Enterprise Sim. If you do not enter a name, email will be delivered under the player's character name that is sending the notification.
- Default Email Address: enter the default email address that you would like Nova to send out all email notifications as. If you do not enter an address, Nova will use the default structure as installed.
Tip
Nova's email structure may be affected by your hosting company's requirements and can experience issues from time to time. For a better look at how Nova handles emails and how you can adjust it, please review Core Concepts: Email.
When all edits are complete, select Submit.
Defining appearance parameters
Under the Appearance tab, the following options are available:
- Skins: select the skin you wish to be default for all visitors to your site, as well as newcomers to the game. To preview any skin, select the magnifying glass next to each section option. Here you can adjust the options for:
- The Main Site, such as the front page, character manifest, and reading posts.
- The Log In Page, where all players will log in and out.
- The Wiki, where information critical to gameplay is stored.
Tip
To install new skins, please review the skinning documentation.
- Display Options:
- Rank Set: Select what you want the default rank set to be by using the dropdown menu. A preview image of the selected rank set will appear under the dropdown.
Tip
To install new rank sets, please review Using Ranks.
- Display Options (continued):
- Mission Posts per Page: determine the maximum number of published missions posts will appear in a list.
- Personal Logs per Page: determine the maximum number of published personal logs will appear in a list.
- Show News on Main Page: select whether or not you wish for published news items to be available for all viewers to see on the site's home page.
- Show Personal Logs on Main Page: select whether or not you wish for published personal logs to be available for all viewers to see on the site's home page.
- Show Mission Posts on Main Page: select whether or not you wish for published mission post entries to be available for all viewers to see on the site's home page.
- Use Mission Notes: enabling this feature will allow the management team to keep relevant details regarding the current story available on the page where players will contribute to the active post.
- Use Sample Post on Join Page: the sample post feature is often required by a game's management staff in order to evaluate a player's writing ability. If you do not wish to use this feature, you can disable it here.
- Post Count Format: Nova allows the management team to count posts in one of two ways:
- Multiple: this will count a post as many times as there are authors. For example, if seven people participated in the post, then that post is counted seven times.
- Single: this post will count posts regardless of the amount of authors. For example, if seven people participated in the post, then only one post will be counted.
When all edits are complete, select Submit.
Adding and editing your own settings
Nova gives administrators the ability to create their own settings to be used throughout the system. Once a setting is created, it can be added to user-created pages or extended core pages and changed through the Site Settings page. At this time, user-created settings can only be edited through a simple text field and you will not have the ability to create a setting that uses a radio button, textarea, or dropdown menu.
To add a setting, click on Manage User-Created Settings from the Site Settings page, then select Add User-Created Setting.
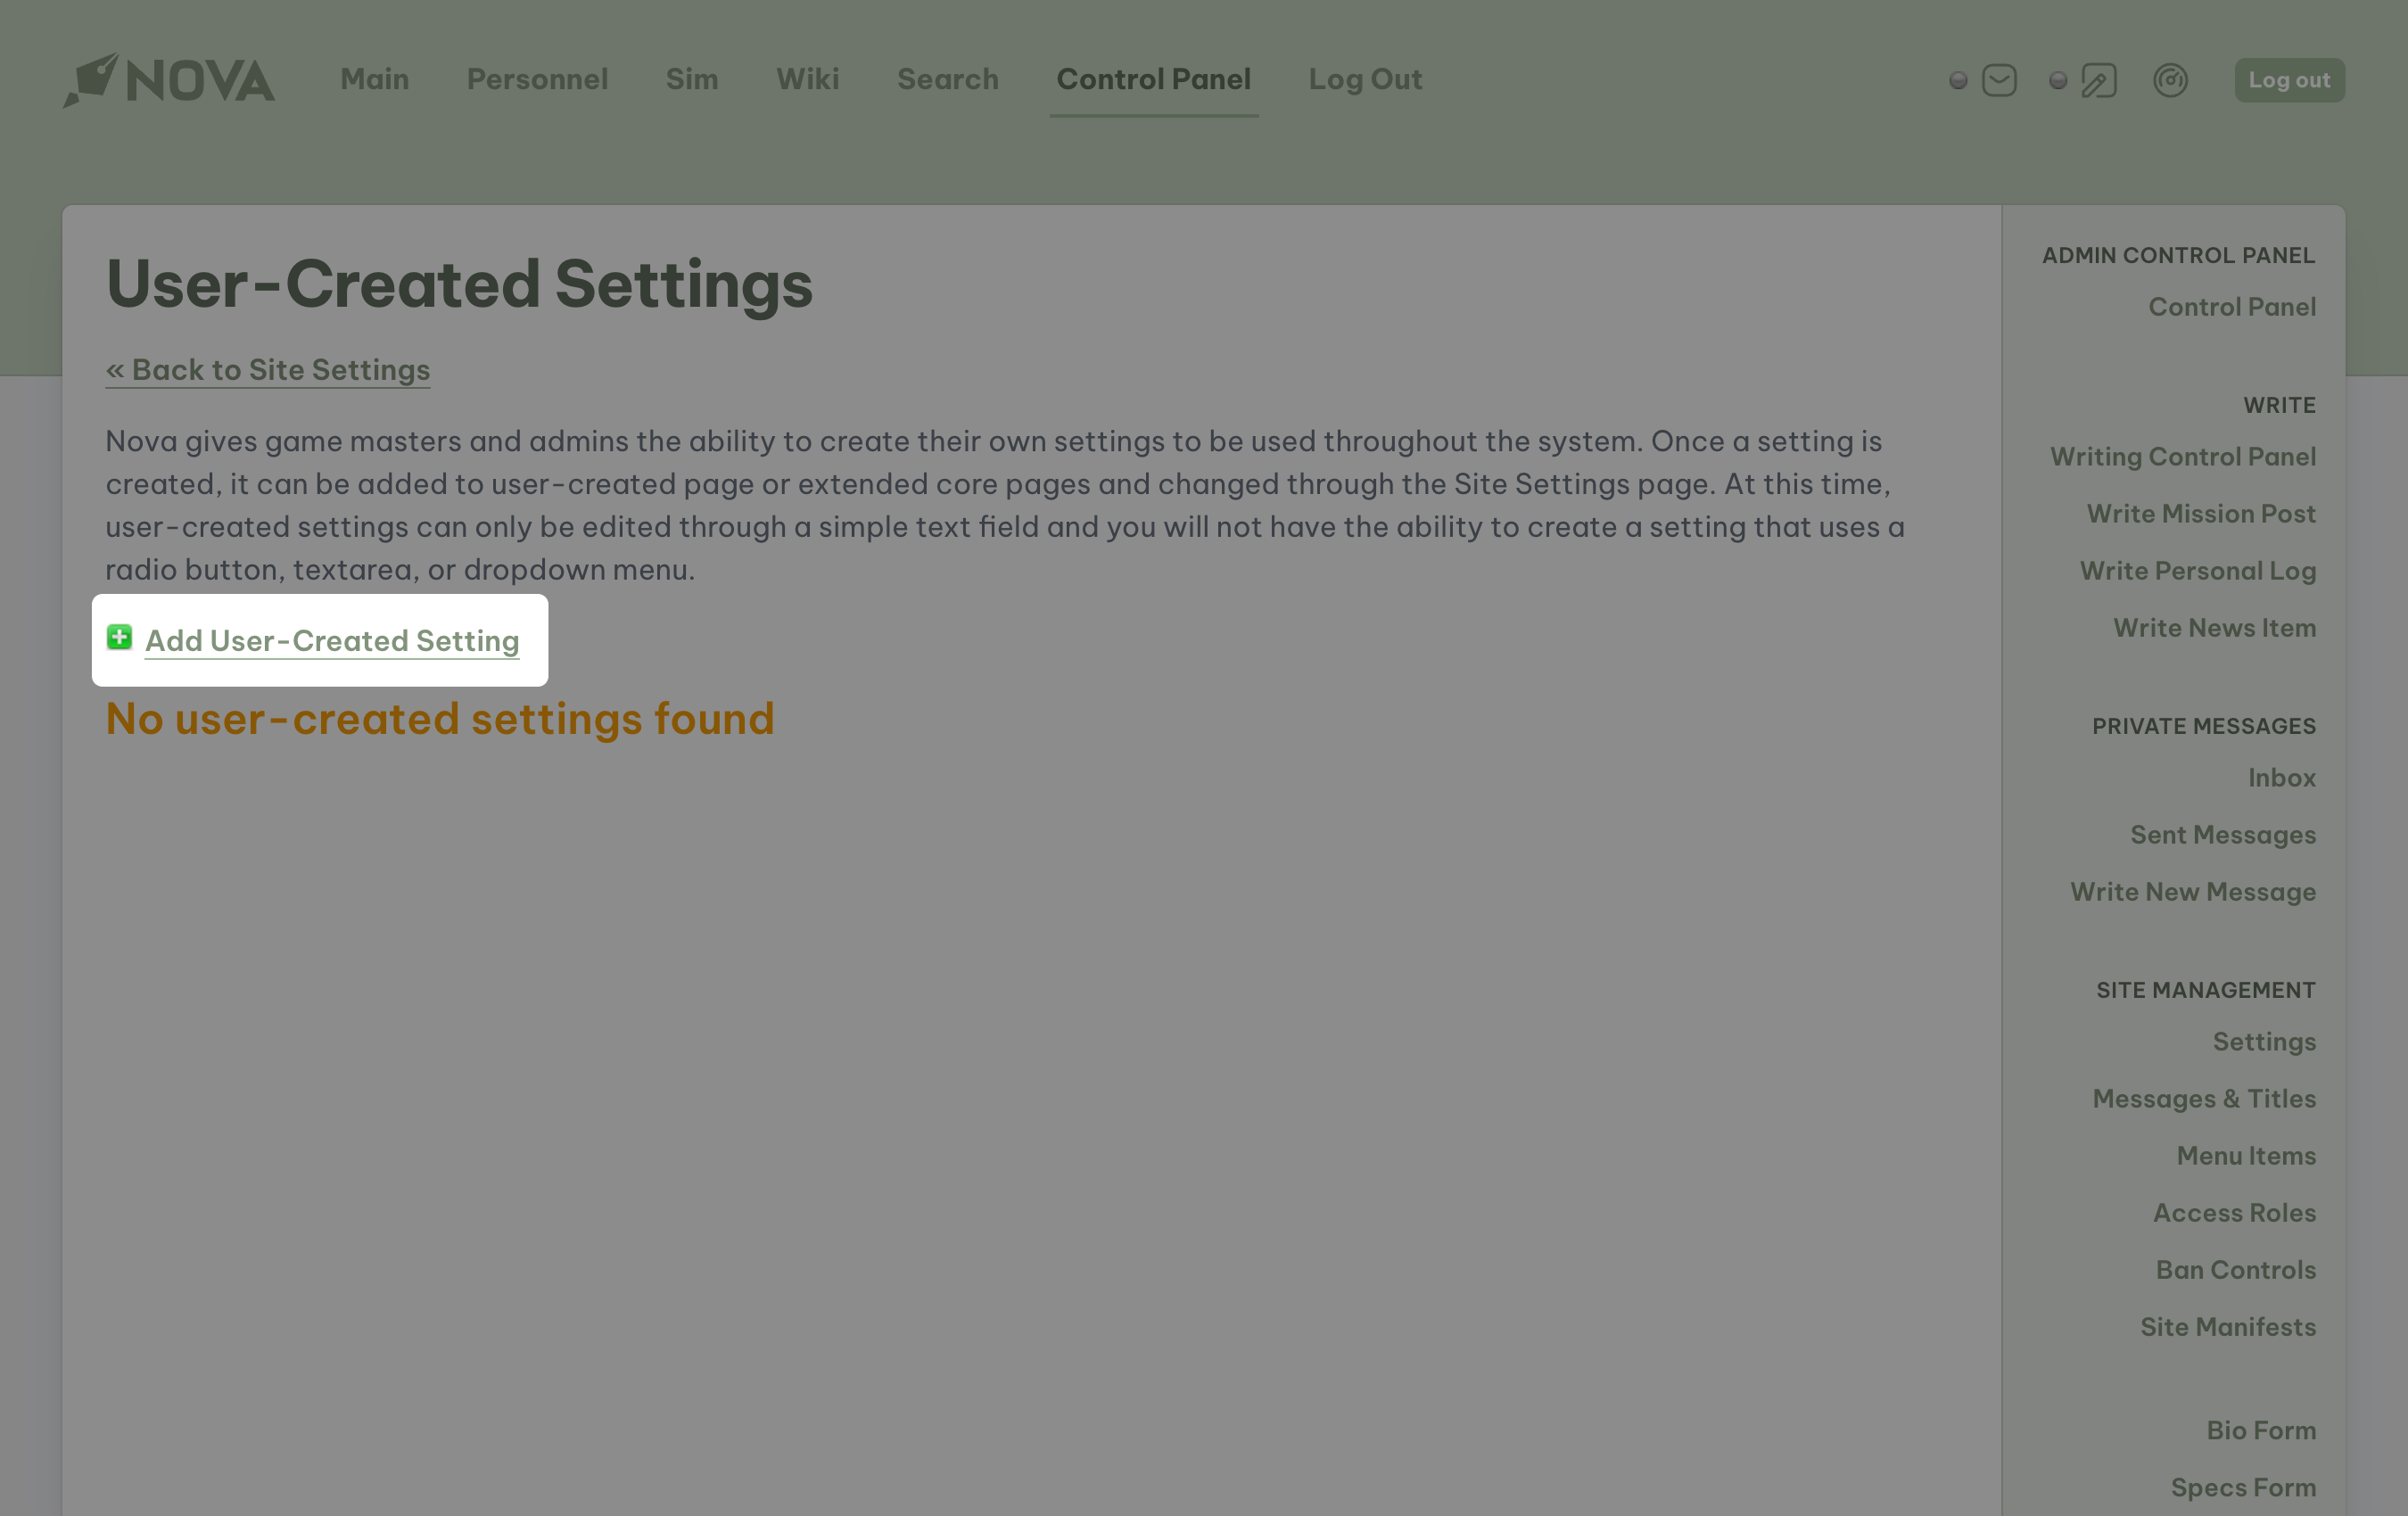
Enter the following information:
- Label: enter a label that will be easy for you to recognize what it is.
- Setting Key: this is the function label that you will be using as you build your custom page or core extensions.
- Value: enter any value that you feel is appropriate for the setting you are creating.
When all edits are complete, select Submit.
To edit an existing User-Created Setting, navigate to Site Settings and a 4th tab will be available. Select the User-created Settings tab to view all available user-created settings and edit any existing values.
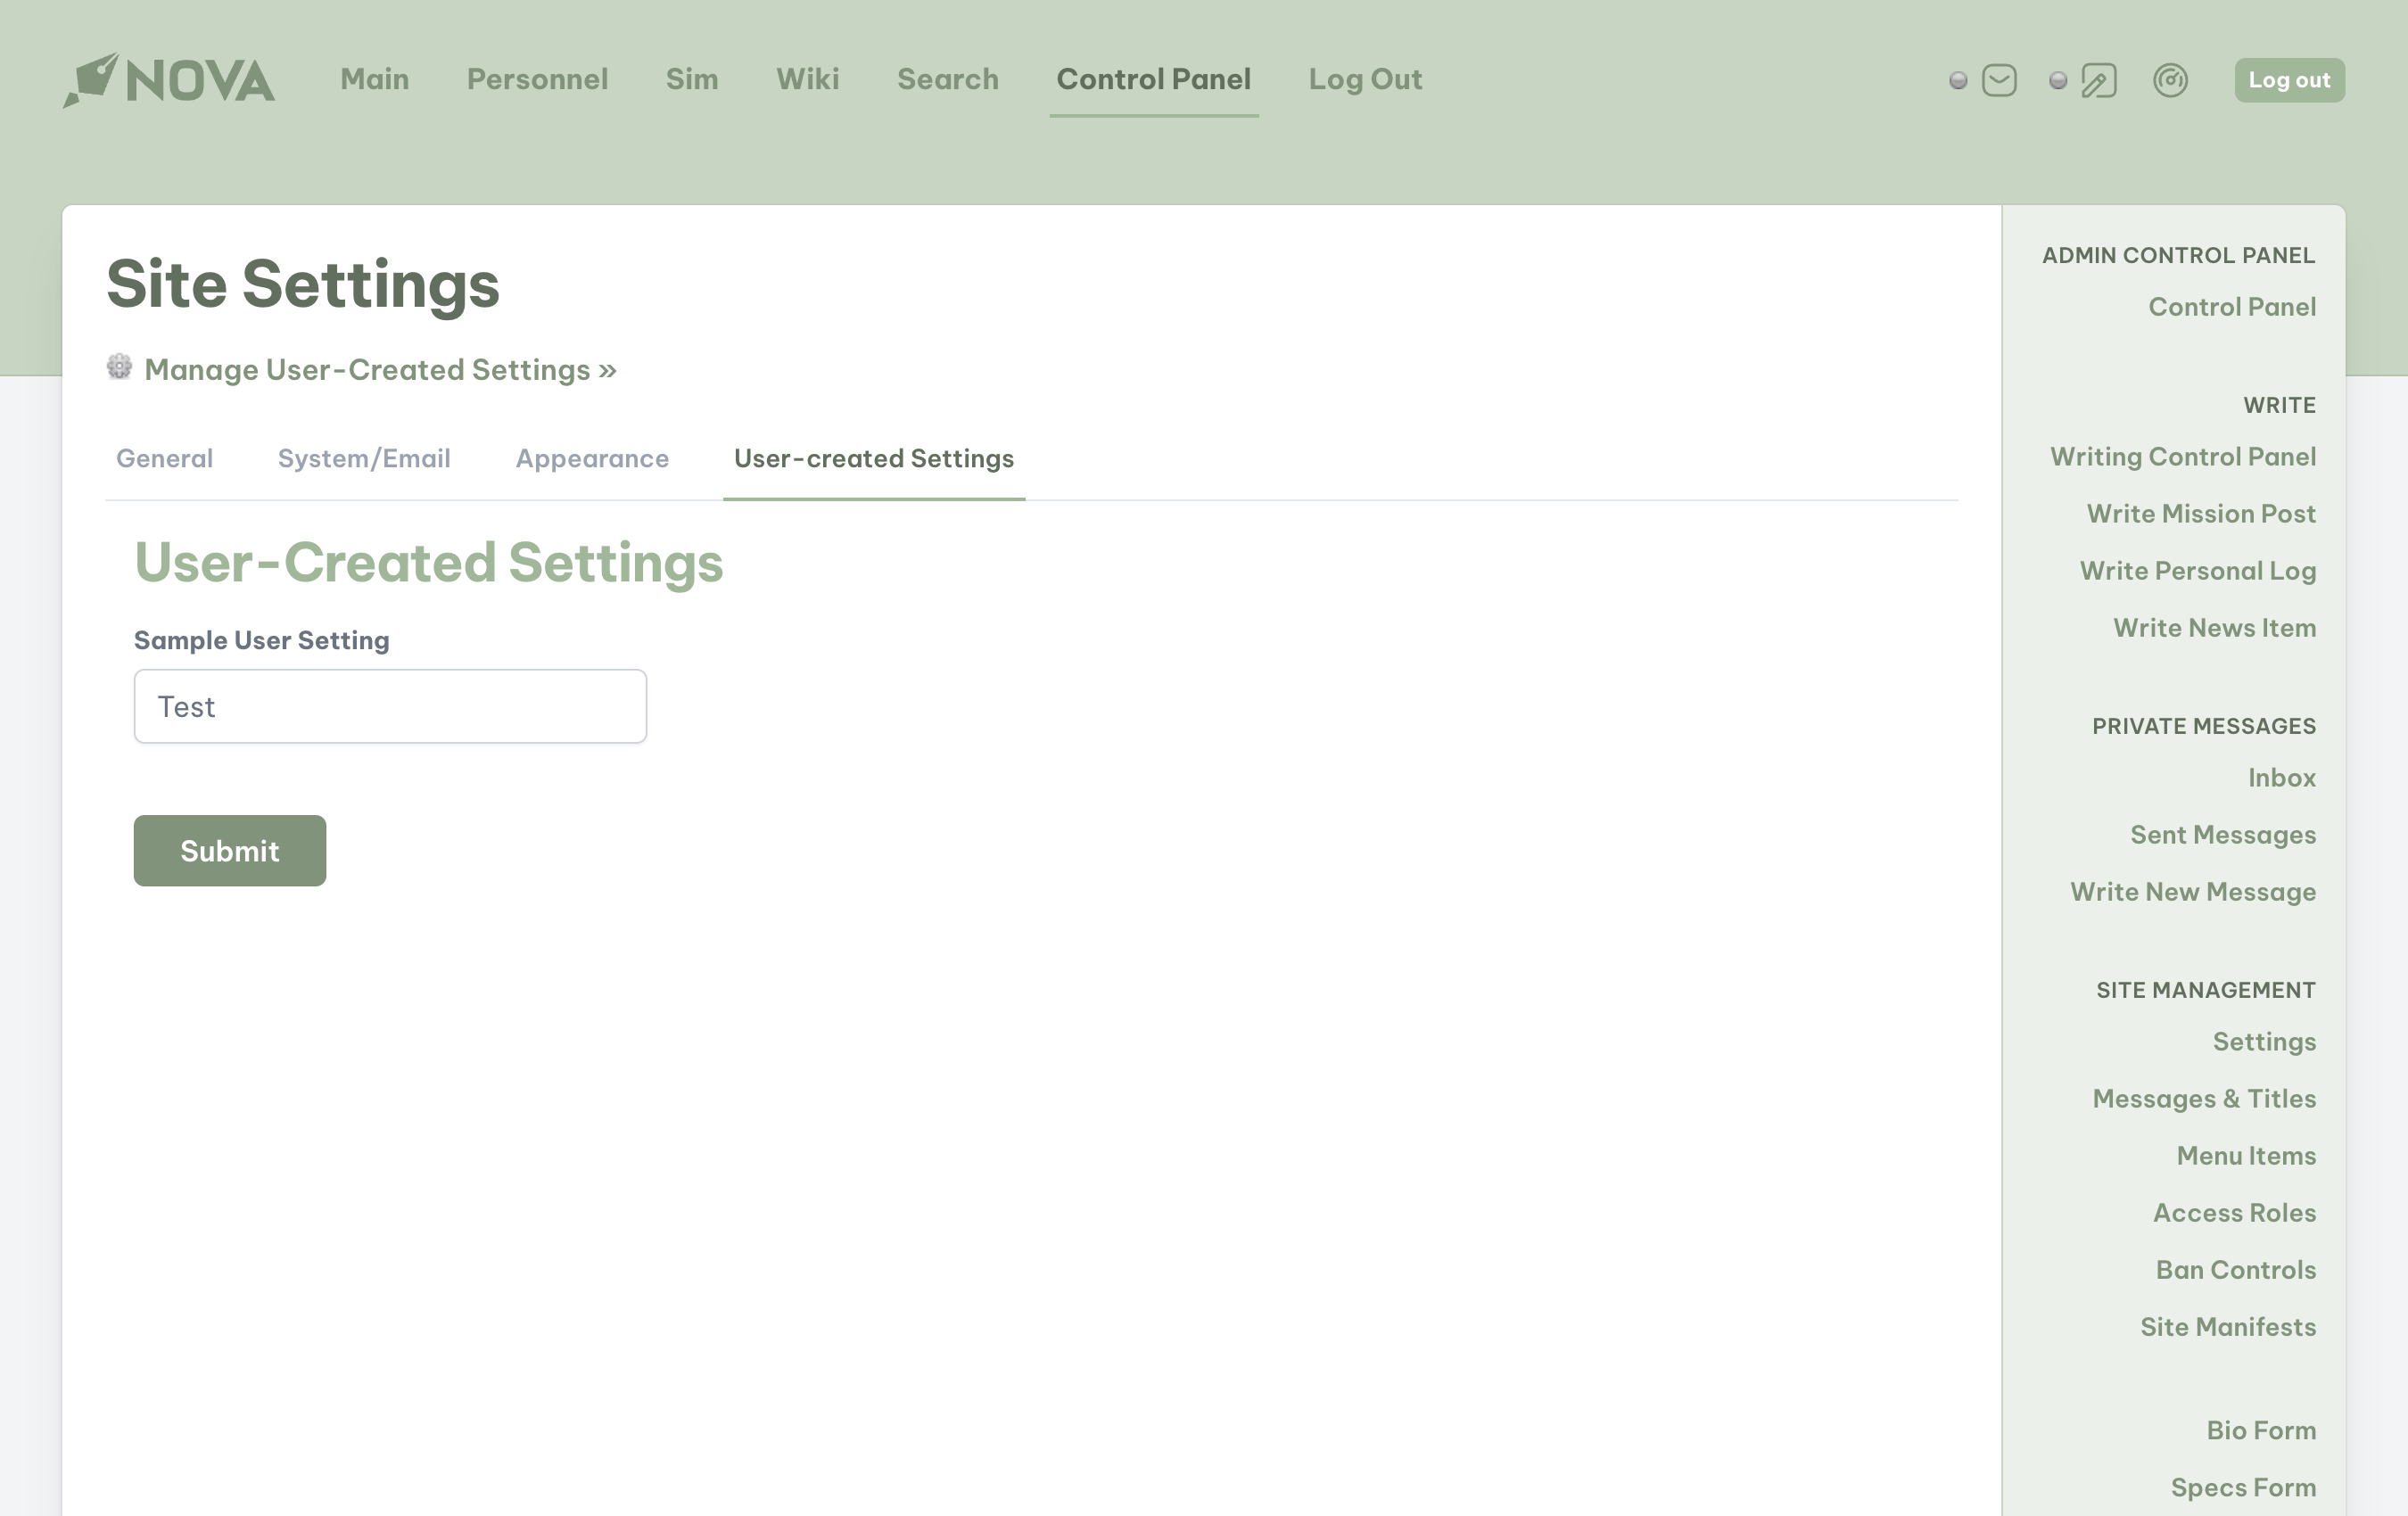
When all edits are complete, select Submit.
Site messages and titles
Nova's basic installation provides each game with common and easily editable pages to help the management team convey to current and potential players important information about the game and story. These features are all contained within Nova's powerful Messages and Titles system.
To access your site's Messages and Titles, access Nova's control panel and locate Messages & Titles under the subheading Site Management. From this screen you will have access to:
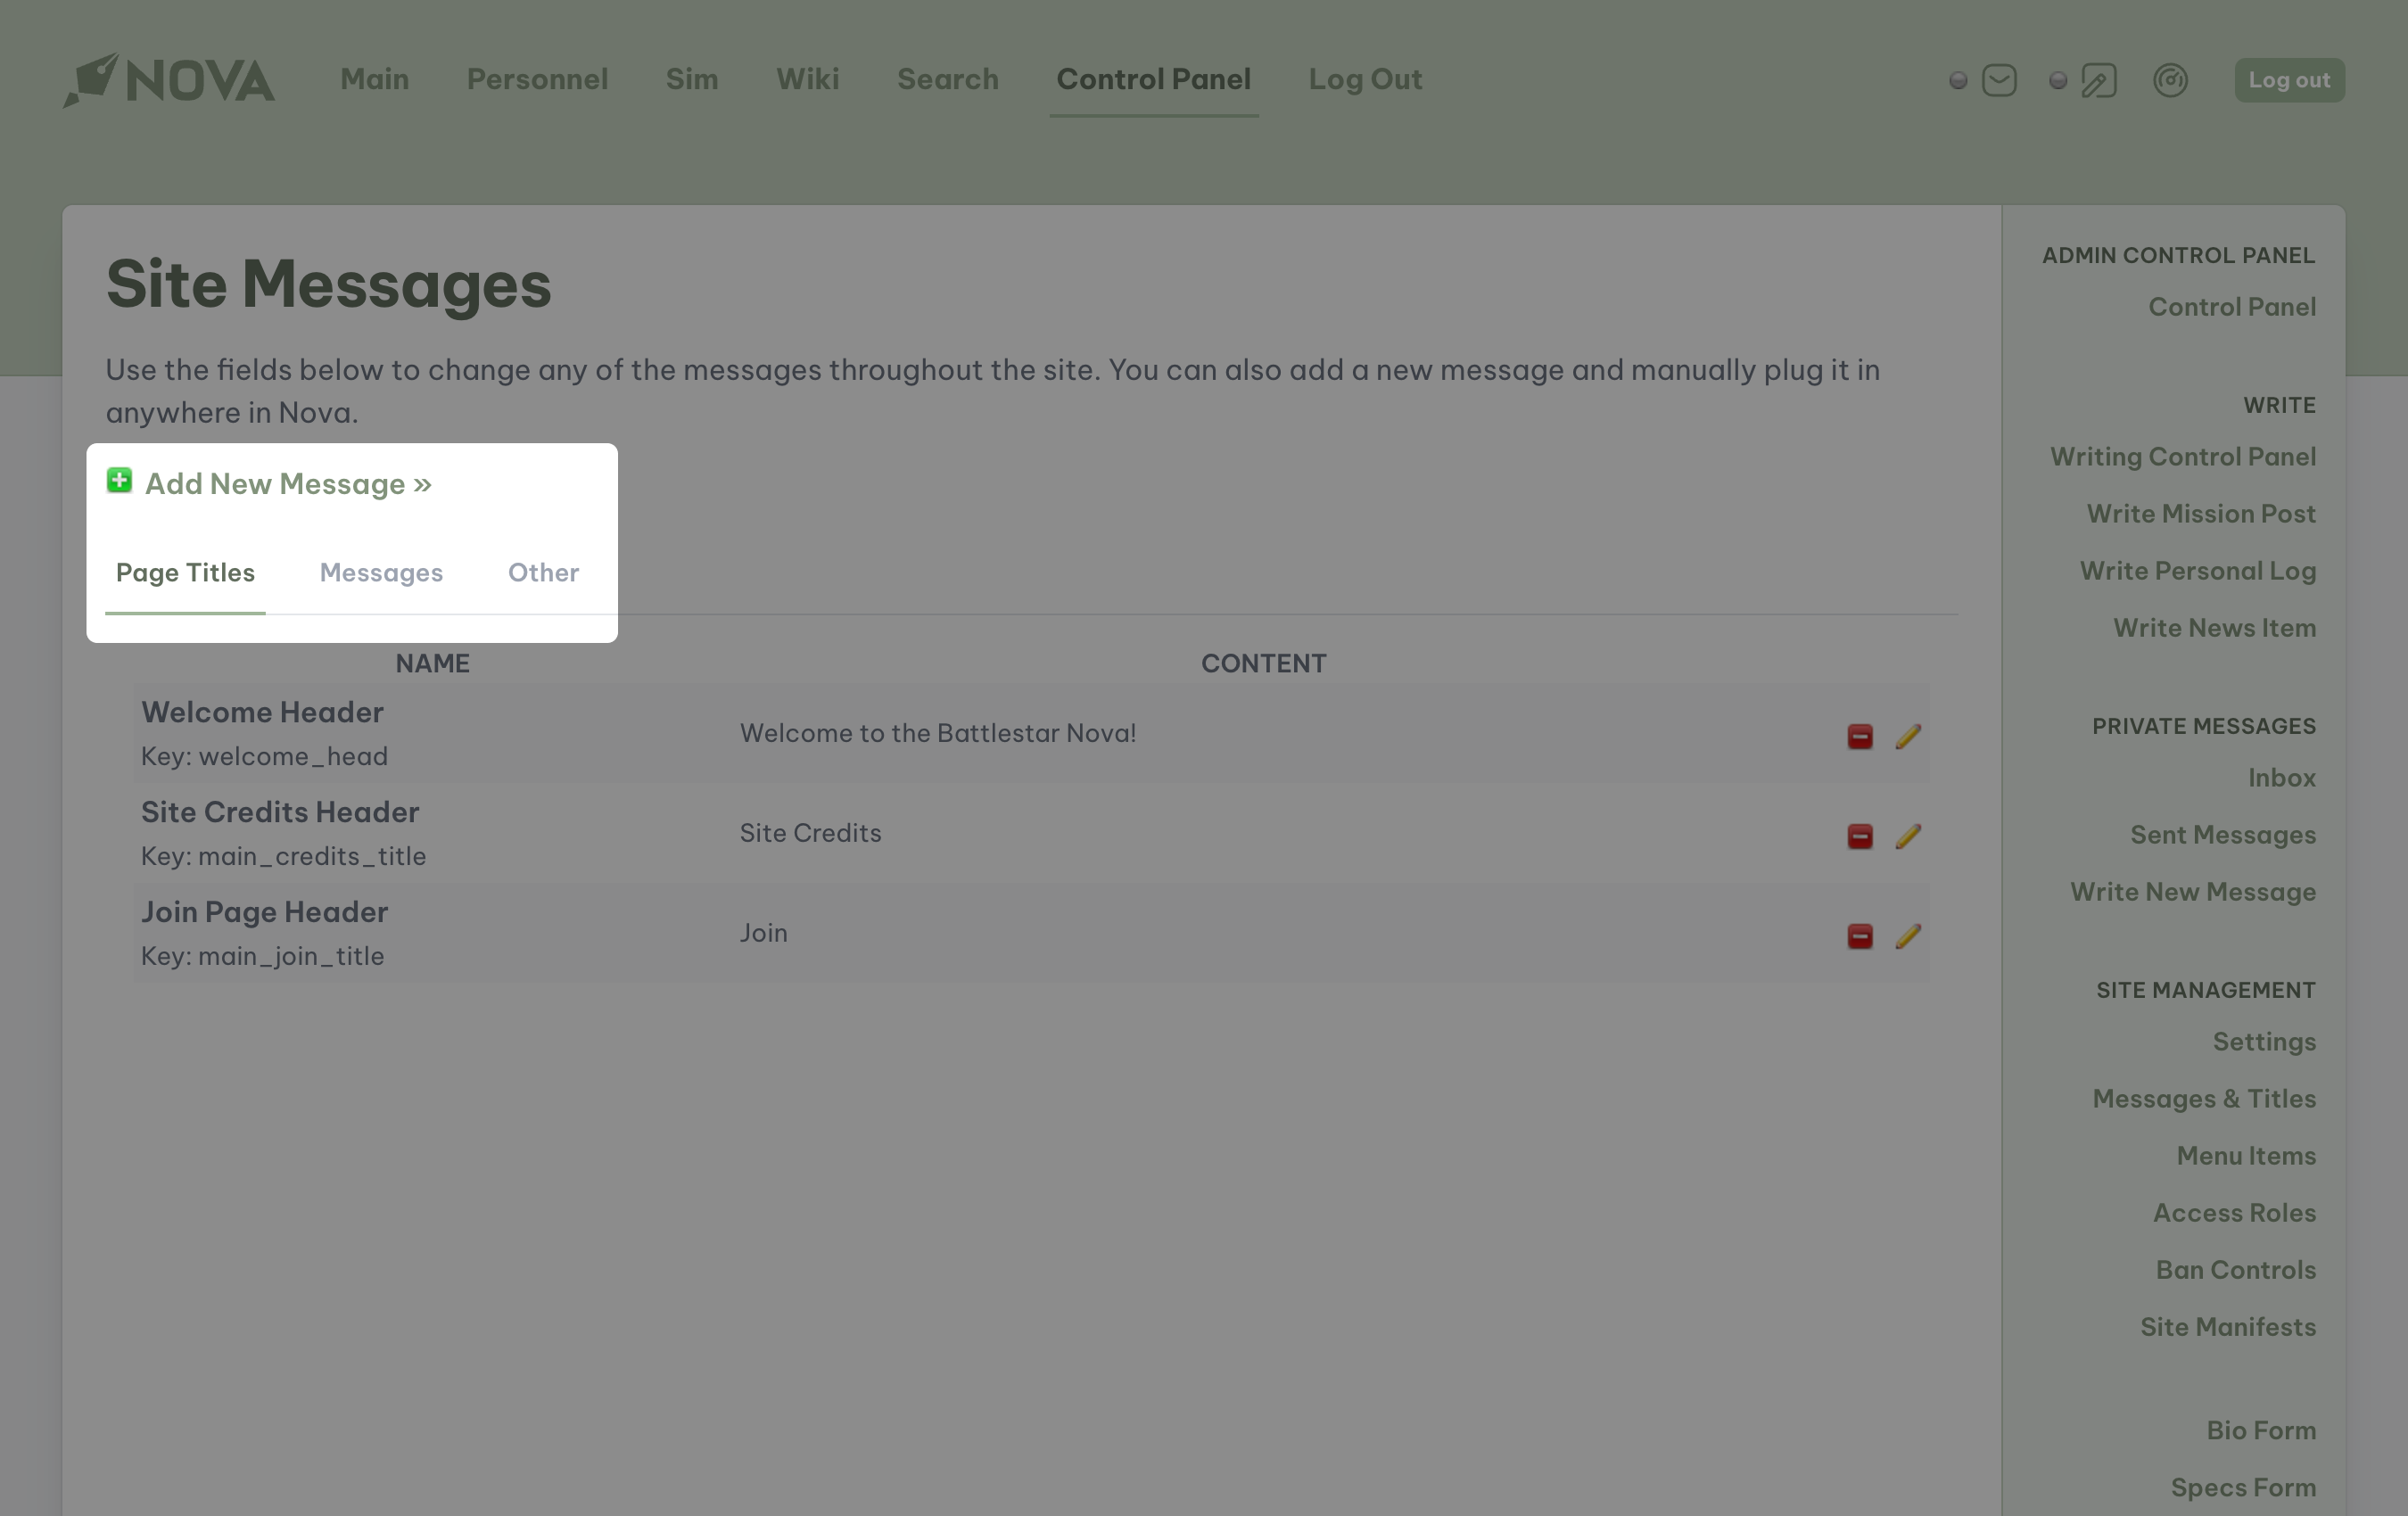
- Add New Message: an advanced feature that enables you to create messages for various pages, extensions and alterations to Nova's structure.
- Page Tiles: titles for key pages throughout Nova.
- Messages: messages that are displayed on key pages throughout Nova.
- Other: other messages, titles, and functions used throughout Nova.
To edit any message, select the pencil icon at the end of that message row.
To delete any message, select the red delete icon at the end of that message row.
Changing a page's title
Under the Page Titles tab, the following options are available:
- Welcome Header: enter what will be displayed under the primary heading of your site's main page.
- Site Credits: enter what will be displayed under the primary heading of your site's credits page.
- Join Page Header: enter what will be displayed under the primary heading of your site's join page.
Editing messages
Under the Messages tab, the following messages are available:
- Welcome Page Message: enter what will displayed under the heading of your site's main page.
- Rules Message: enter any rules you wish for your players to abide by. These will be displayed on your site's main page.
- Sim Message: enter any information about your game. This will be displayed on your site's sim page.
- Wiki Main Page Message: this message has been depreciated thanks to the Thresher Wiki system. To learn more, please review Using the Wiki
- Credits: enter any credits for other copyrighted material used on your site, including images, as well as any copyright disclaimers you may have. This message will be displayed on your site's credits page.
- Join Instructions: enter any instructions you may have for players who are filling out an application to join your game. This message will be displayed throughout the application process.
- Contact Instructions: enter any instructions, or a message, you may have for users contacting the management staff through the contact form on the front of the site.
- Privacy Policies: Nova currently establishes four basic policies upon installation. These policies can be used as they are originally installed, but it is highly recommended that you modify these if you add features to your site such as Google Analytics or any other service that might track the usage of your site. The included policies are:
- Privacy Policy
- Cookie Policy
- Do Not Track Policy
- California Privacy Rights Policy
Other messages
Under the Other tab, the following options are available:
- Join Disclaimer: this message defaults to a Children's Online Privacy Protection Act of 1998 (COPPA) notice, as well as basic warnings about the game. If you wish to add additional information, such as anything mandated by a fleet or organization that your game is a participant of, you will want to add that infomration here.
- Join Sample Post: if you are requiring a sample post from applicants, you can enter the prompt(s) for the sample post here.
- User Acceptance Email: create the basic template for emails that the system will send to each user upon approval of their character. You will be able to customize this message further when accepting a player's application.
- User Rejection Email: create the basic template for emails that the system will send to each user upon rejection of their character. You will be able to customize this message further when rejecting a player's application.
- Docking Acceptance Email: this feature has been depreciated in recent versions of Nova. The Docking feature is generally used by games under the Base gametype to show what other games may be currently "docked" at that base. If you are using the docking feature, you can define your default acceptance message here for any docking request that you may approve.
- Docking Rejection Email: this feature has been depreciated in recent versions of Nova. If you are using the docking feature, you can define your default rejection message here for any docking request that you may reject.
Creating new messages
Nova gives administrators the ability to create their own messages to be used throughout the system, especially when creating their own pages and extensions. Once a message or title is created, it can be edited through the selected tab on the Messages & Titles page.
To add a message, click first on Add New Message from the Site Messages page.
Enter the following information:
- Message Label: enter a label that will be easy for you to recognize what it is.
- Message Key: this is the function label that you will be using as you build your custom page or core extensions.
- Type: select Page Titles, Messages, or Other. This will determine what tab your newly created message will appear under.
- Content: enter any content that you feel is appropriate for the message or title you are creating.
When all edits are complete, select Submit.
To edit any custom message or title that you created, navigate to the appropriate tab in the Site Messages page.