Nova's robust access control system allows a game's management team to assign specific roles and permissions based on that player's in-character and out-of-character involvement in the game. These functions are all maintained through the Access Roles system.
Understanding access roles
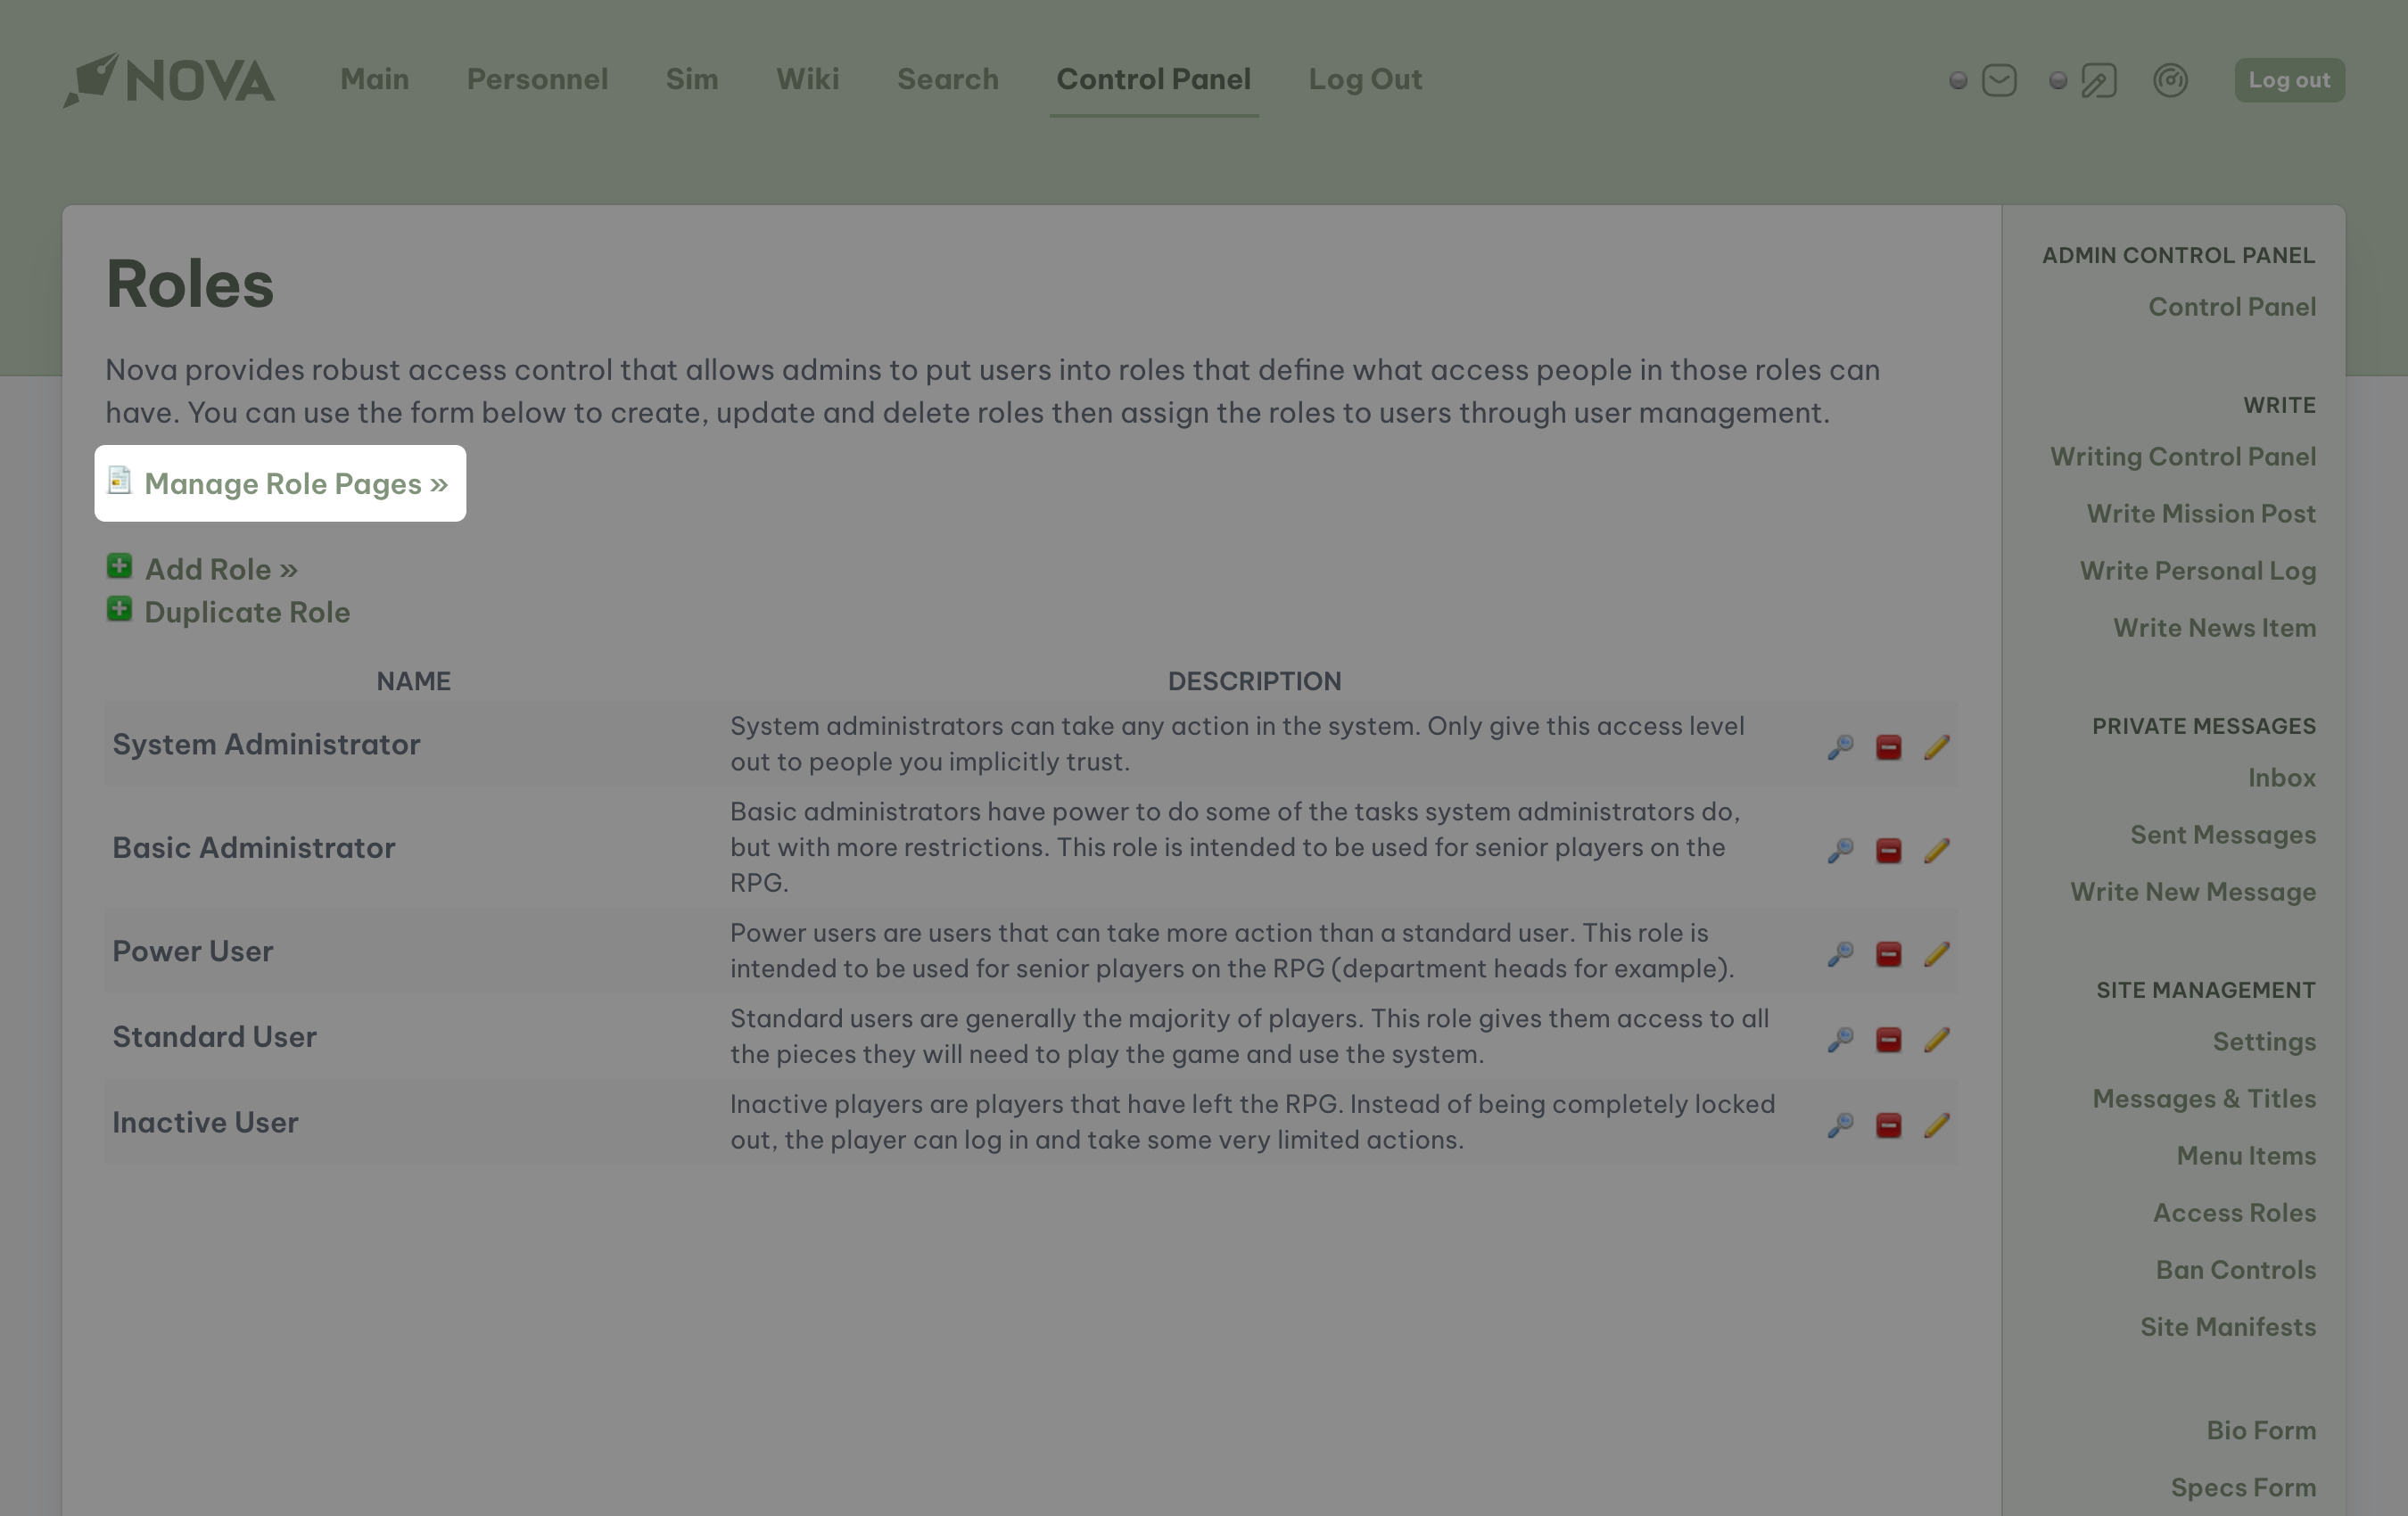
Nova ships with five different access roles, designed to accomodate the most common use cases throughout online role playing. Users can only have one access role attached to their account at a time, so make sure you are giving the right people the right permissions at all times.
System administrator
System administrators can take any action within the Nova system, including removing other administrators. System administrators have full access to Nova's control panel and features, but they will not have direct access to Nova's database or file structure as both of these items exist outside of Nova and reside only with your website'.
Warning
Please exercise caution when granting this role to another user, as that user could disable your account with these permissions.
Basic administrator
Basic administrators have the ability to perform some of the tasks system administrators do, but with more restrictions. In addition to all of the abilities Power users and Standing users have, users with this role CAN:
- Manage uploads: can delete images that were uploaded to Nova's tour, awards, specifications, missions, and character sections.
- Data management: can add, edit, or delete items such as specifications, deck listings, posts, news items, personal logs and wiki pages.
- Character management: can edit any character within the system and manage support characters.
- User management: can update any user account within the system and assist with user moderation.
Users with this role will NOT be able to:
- Ban users: restrict pesky users from applying to the sim.
- Site management: manage site settings; messages; edit forms and menus; add or remove skins, rank sets, and manifests.
- Data management: manage departments, positions, ranks, awards and missions.
- Versioning: view what version of Nova the site is using.
- Awards: approve or reject award nominations.
Power user
Power users are users that can take more action than a standard user. This role is intended to be used for senior players on the game, such as department heads in a Star Trek game. In addition to all of the abilities Standing users have, users with this role CAN:
- Reports: view crew activity, posting levels, milestones, and statistics.
- Character management: can edit the bio of any support character (NPC) within Nova, as well as manage any support character assigned to their department.
- Wiki: can create or edit any wiki page within Nova.
Users with this role will NOT be able to:
- Manage uploads: can delete images that were uploaded to Nova's tour, awards, specifications, missions, and character sections.
- Site management: manage site settings; messages; edit forms and menus; add or remove skins, rank sets, and manifests.
- Data management: manage departments, positions, ranks, awards, missions, specifications, deck listings, posts and news items that they were not an author of.
- Versioning: view what version of Nova the site is using.
- Awards: approve or reject award nominations.
Standard user
Standard users are generally the majority of players on a game using Nova. These users are given the most basic sets of permissions in order to participate in the game and interact with the other players. All users with this role CAN:
- Control panel: access a limited version of Nova's control panel.
- Upload images: upload character images.
- Private messages: send and receive private messages.
- Writing: write and publish mission posts, personal logs, and news entries.
- Management: edit and delete any of their own posts, logs, and news entries.
- Characters: edit their own character's bio, as well as create new characters such as NPCs.
- Awards: nominate their fellow players for any of the awards available within Nova.
- Wiki: create and edit any of their own wiki pages.
- User management: can edit their own account, and possess the ability to delete their own account and user information from Nova.
Any user with this role will NOT be able to perform any management tasks that are available to Power users, Basic administrators, and System administrators.
Inactive users
Inactive users is a role granted only to users who are no longer particiating in the game. All users with this role CAN
- Private messages: send and receive private messages.
- Characters: edit their own character's bio, as well as create new characters such as NPCs.
- User management: can edit their own account, and possess the ability to delete their own account and user information from Nova.
Any user with this role will NOT be able to:
- Write posts, logs, or news entries
- Create and edit wiki pages
- Upload images
- Edit or delete any of their own published or saved posts, logs, or news entries
Creating and editing
To edit any access role in Nova, you must have at least the System Administration access role, or your access role needs to have the appropriate setting management (such as Role Access etc.) feature(s) enabled. Typically, this feature is reserved for those who are managing the game.
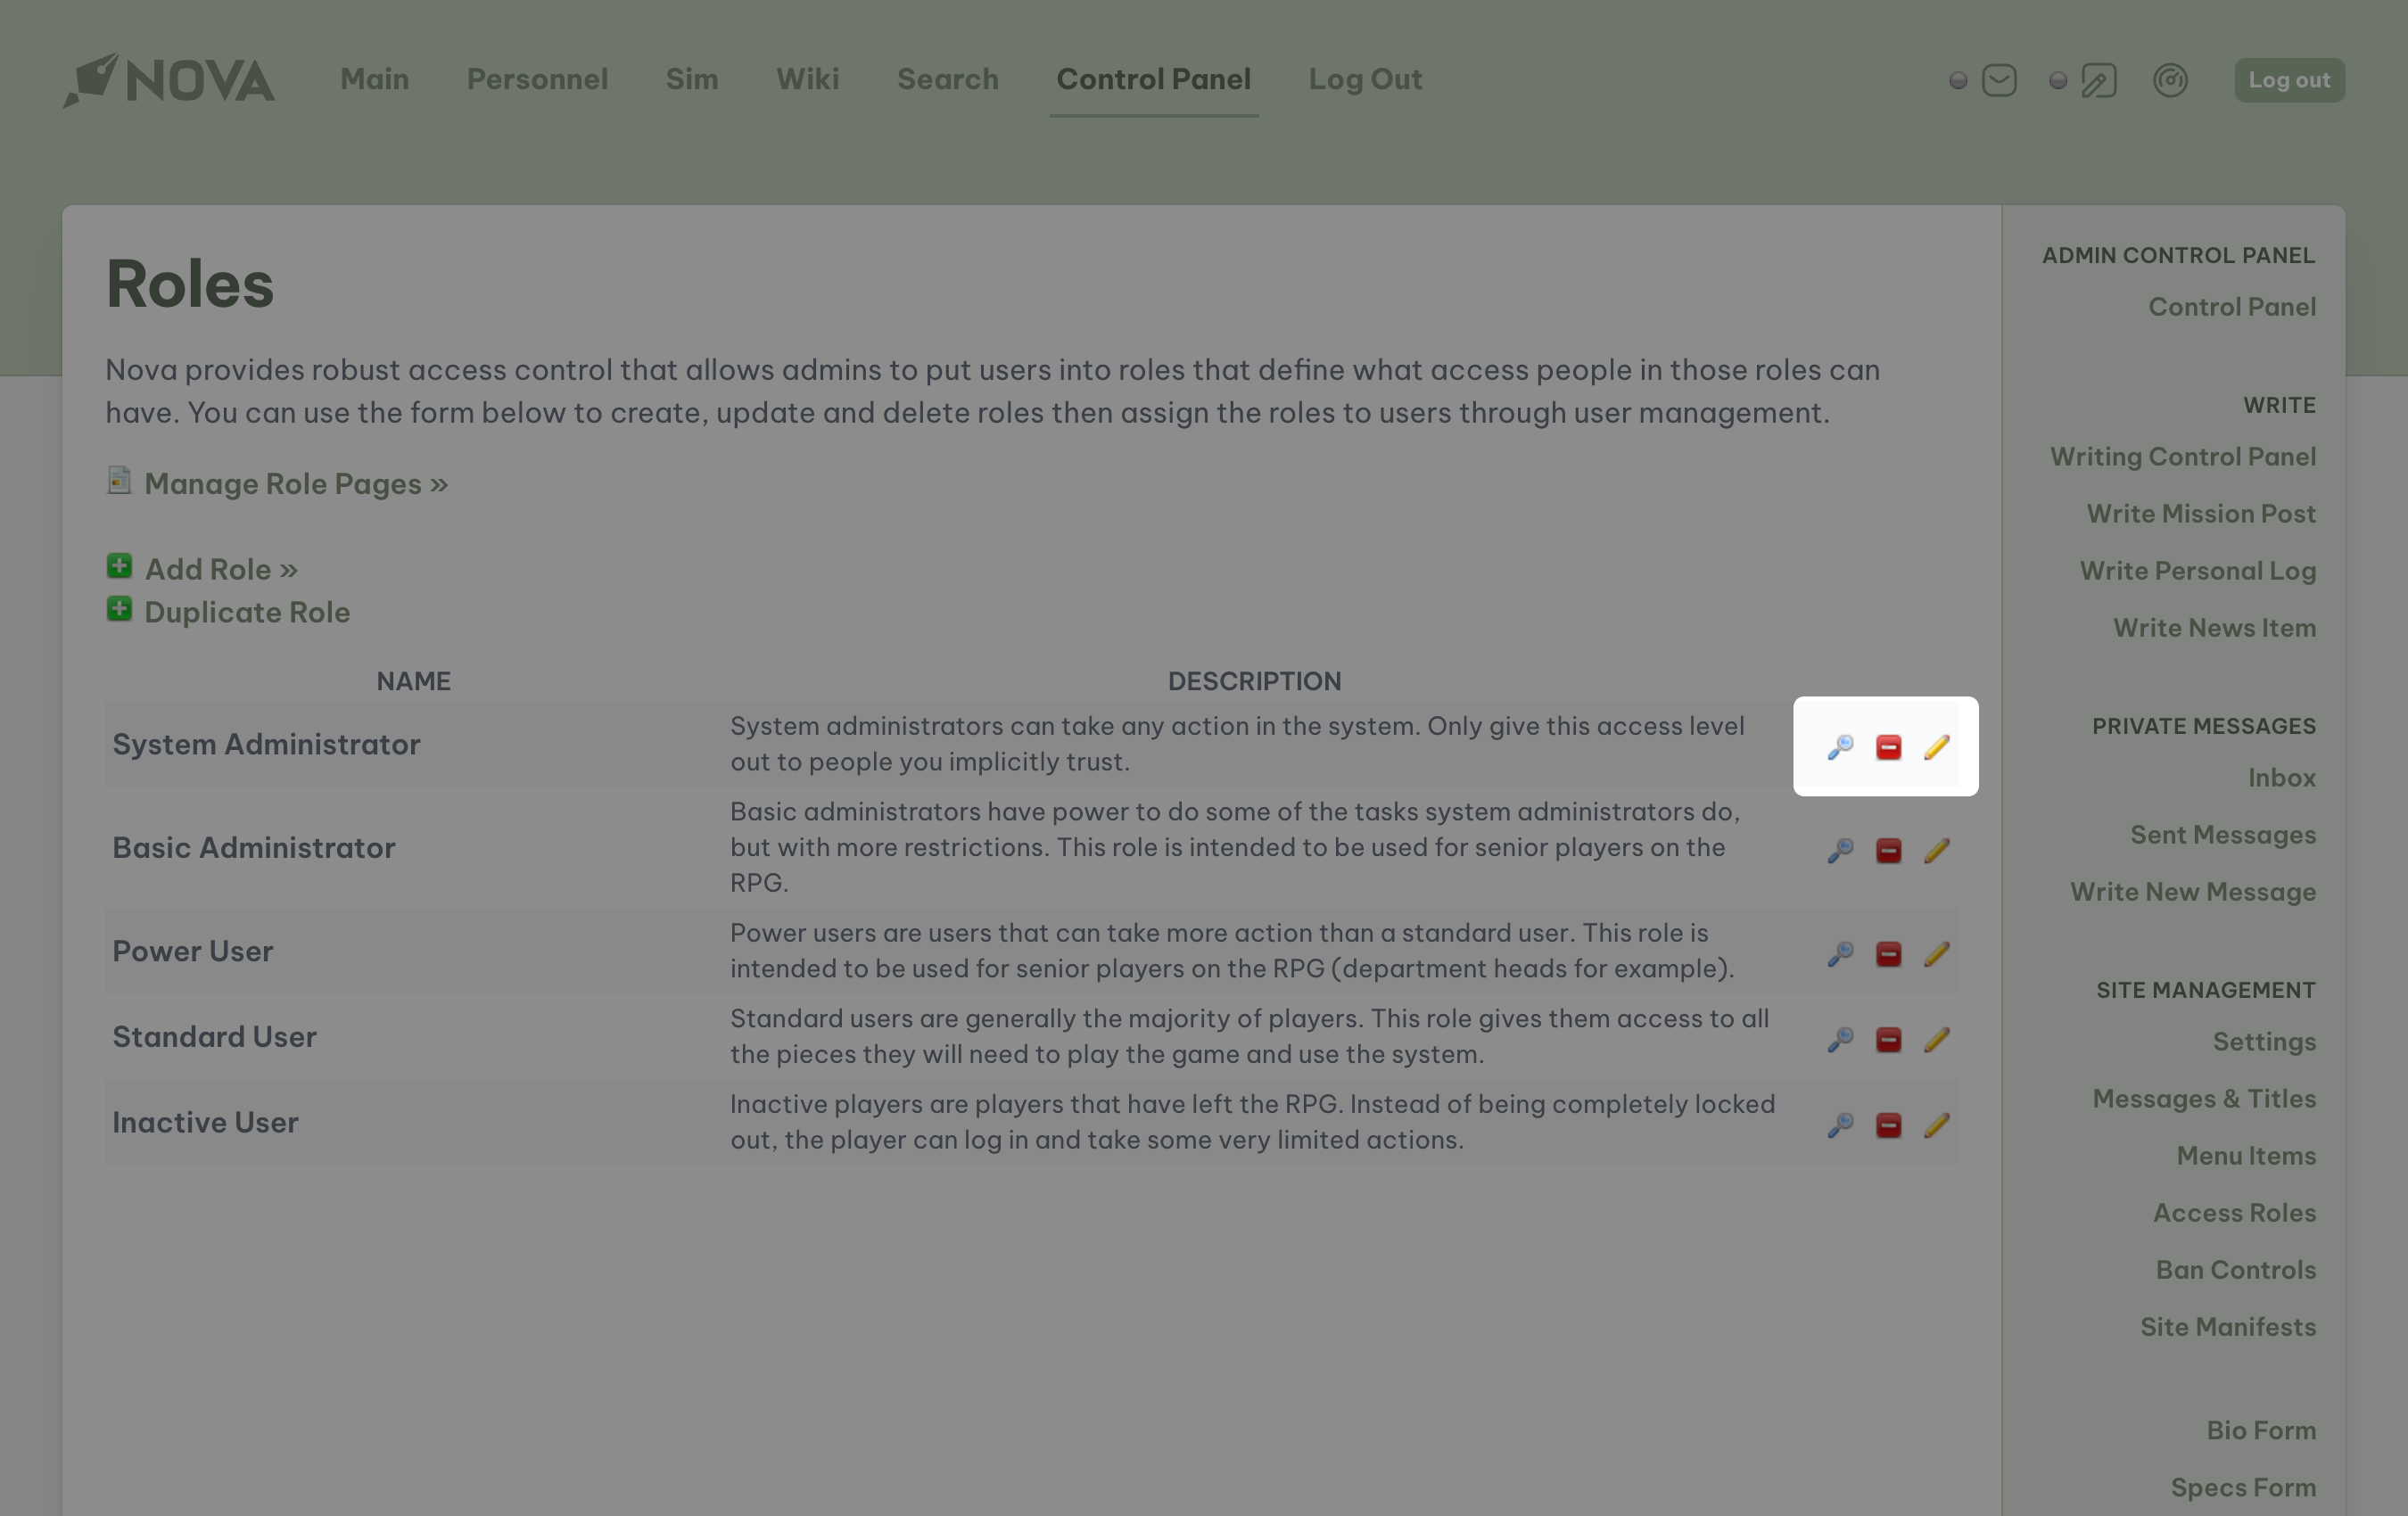
To access any of the access roles available on Nova, access Nova's control panel and locate Access Roles under the subheading Site Management.
To edit existing access roles, click on the Edit icon to the far right of the role you wish to edit. To delete a role, select the appropriate Delete icon. To view a list of all users who possess each role, click the View icon.
When editing a role, check or uncheck the permissions you wish to give or remove from that particular group of users. Once you are finished, click on the Submit button at the bottom of the page.
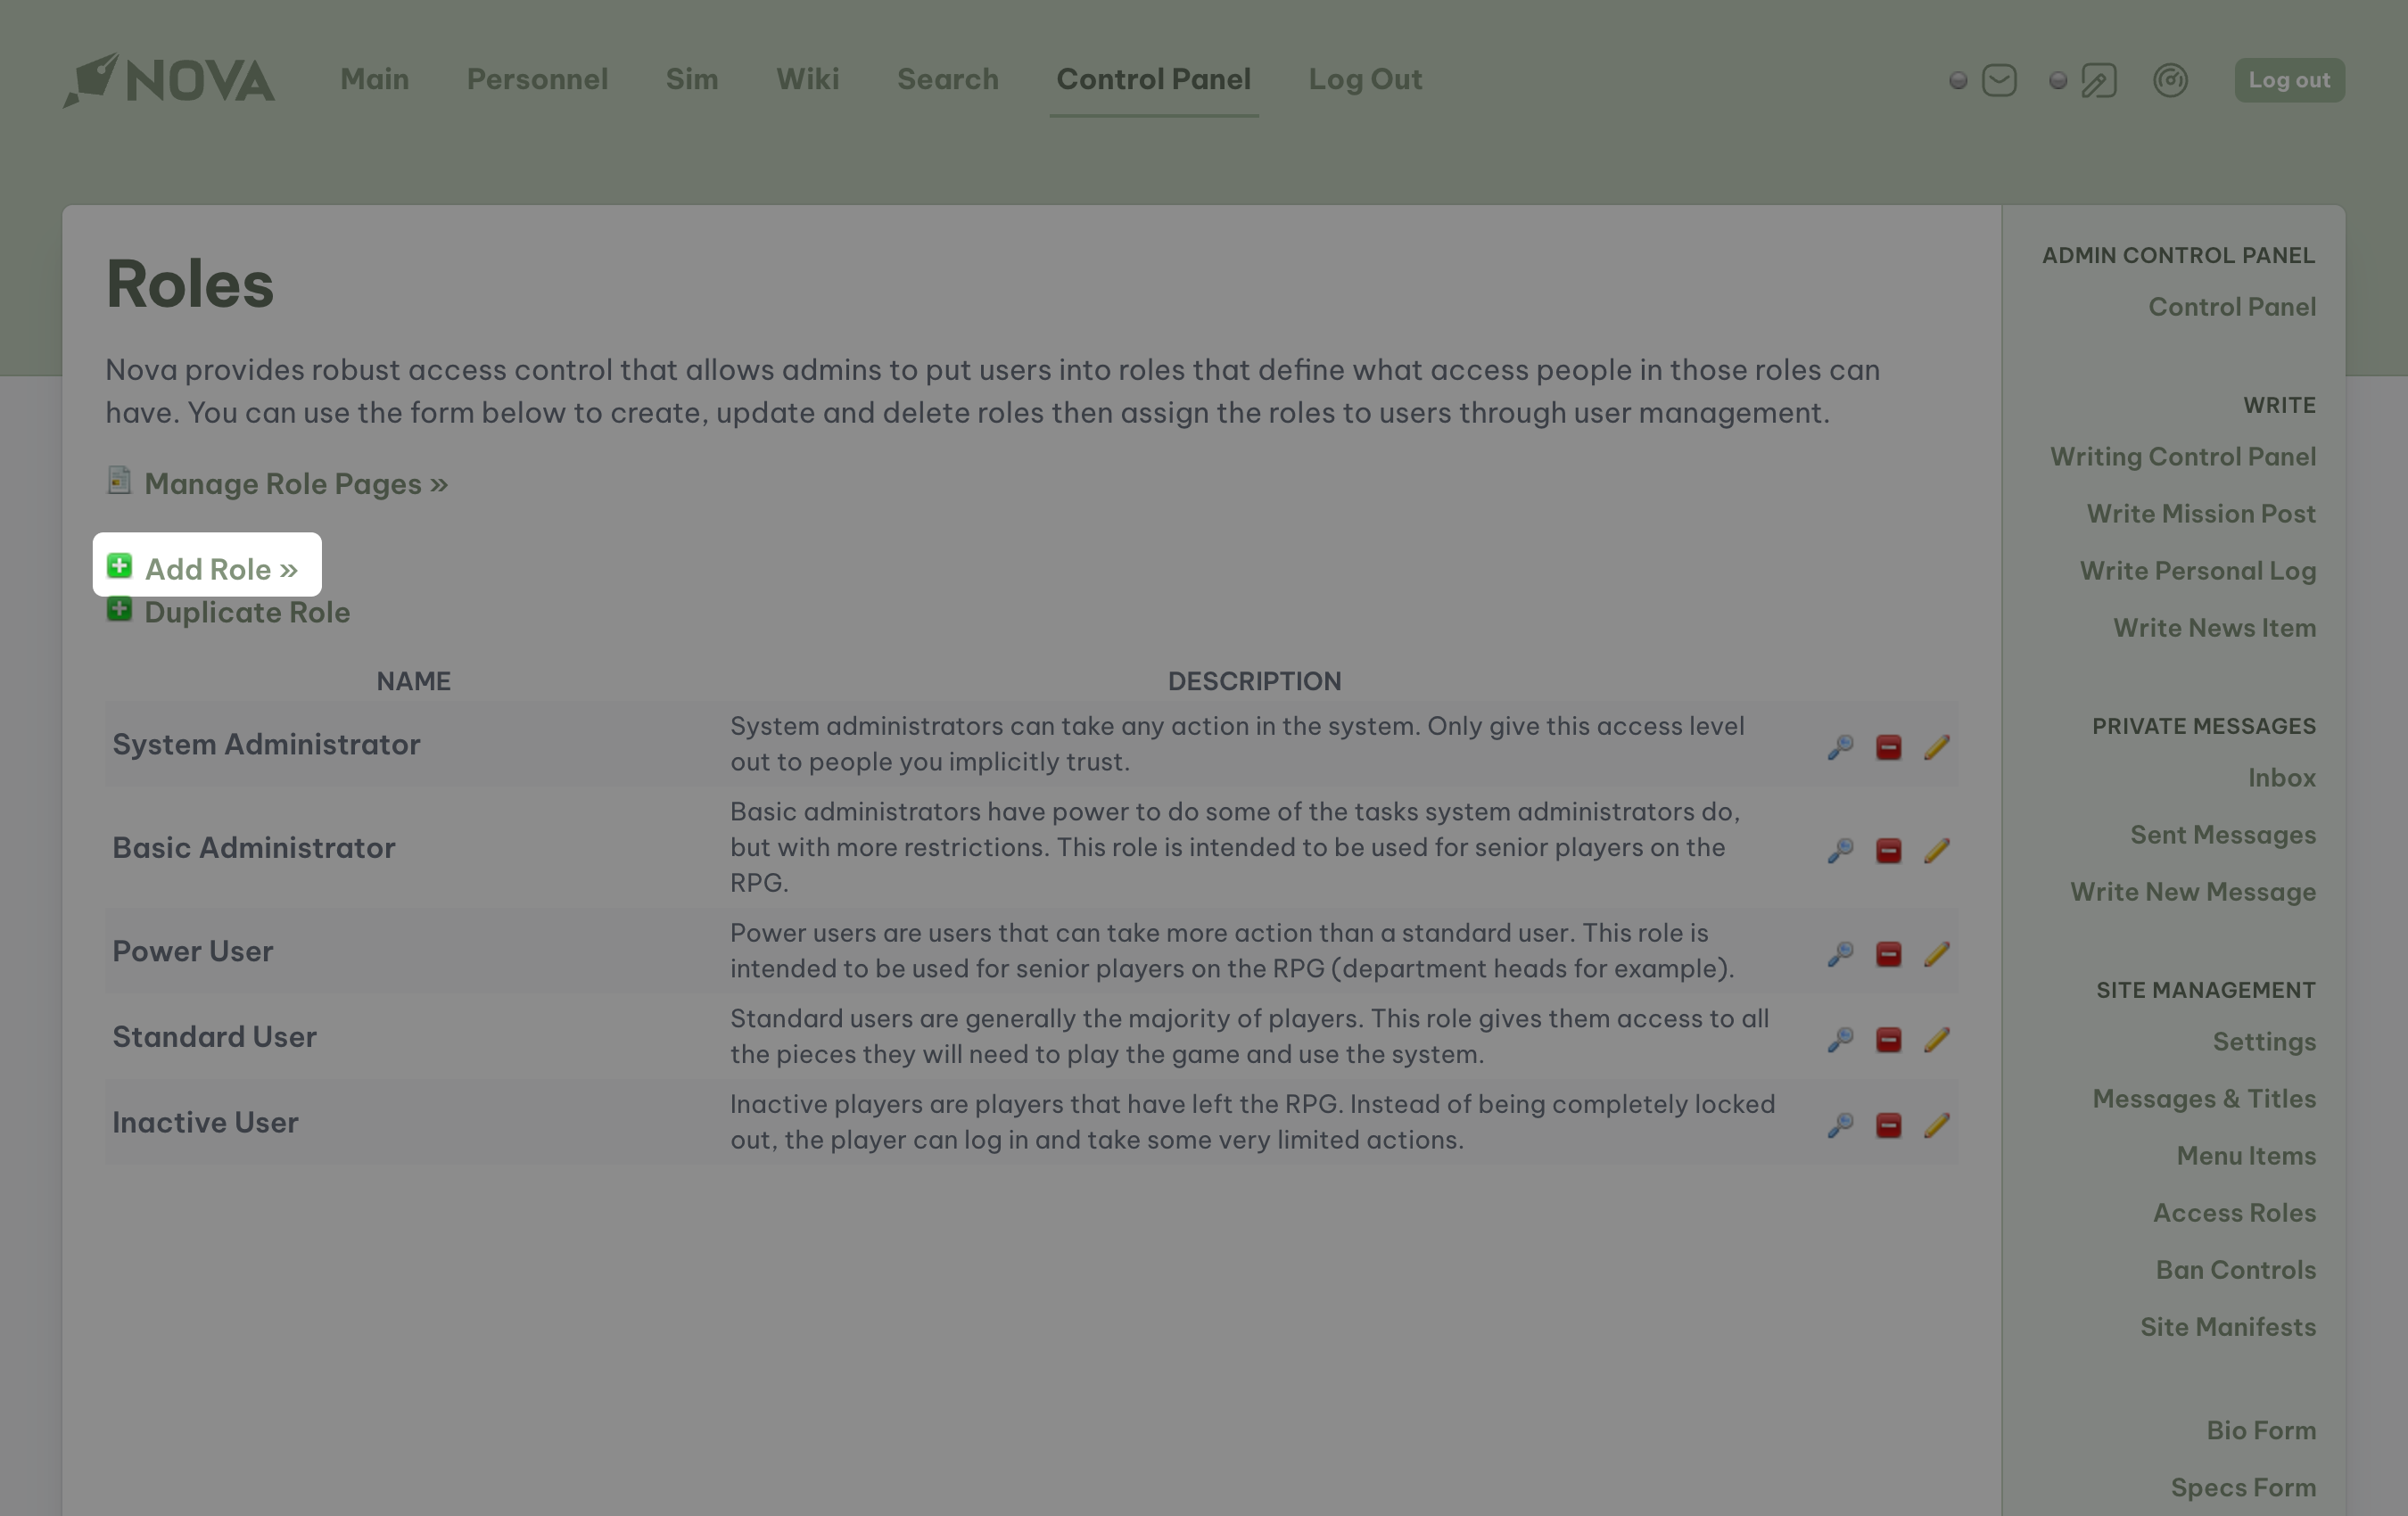
To add a role, click on the Add Role option at the top of the page. Enter a name and a description of the role, select the appropriate permissions throughout the page, and then click the Submit button when finished.
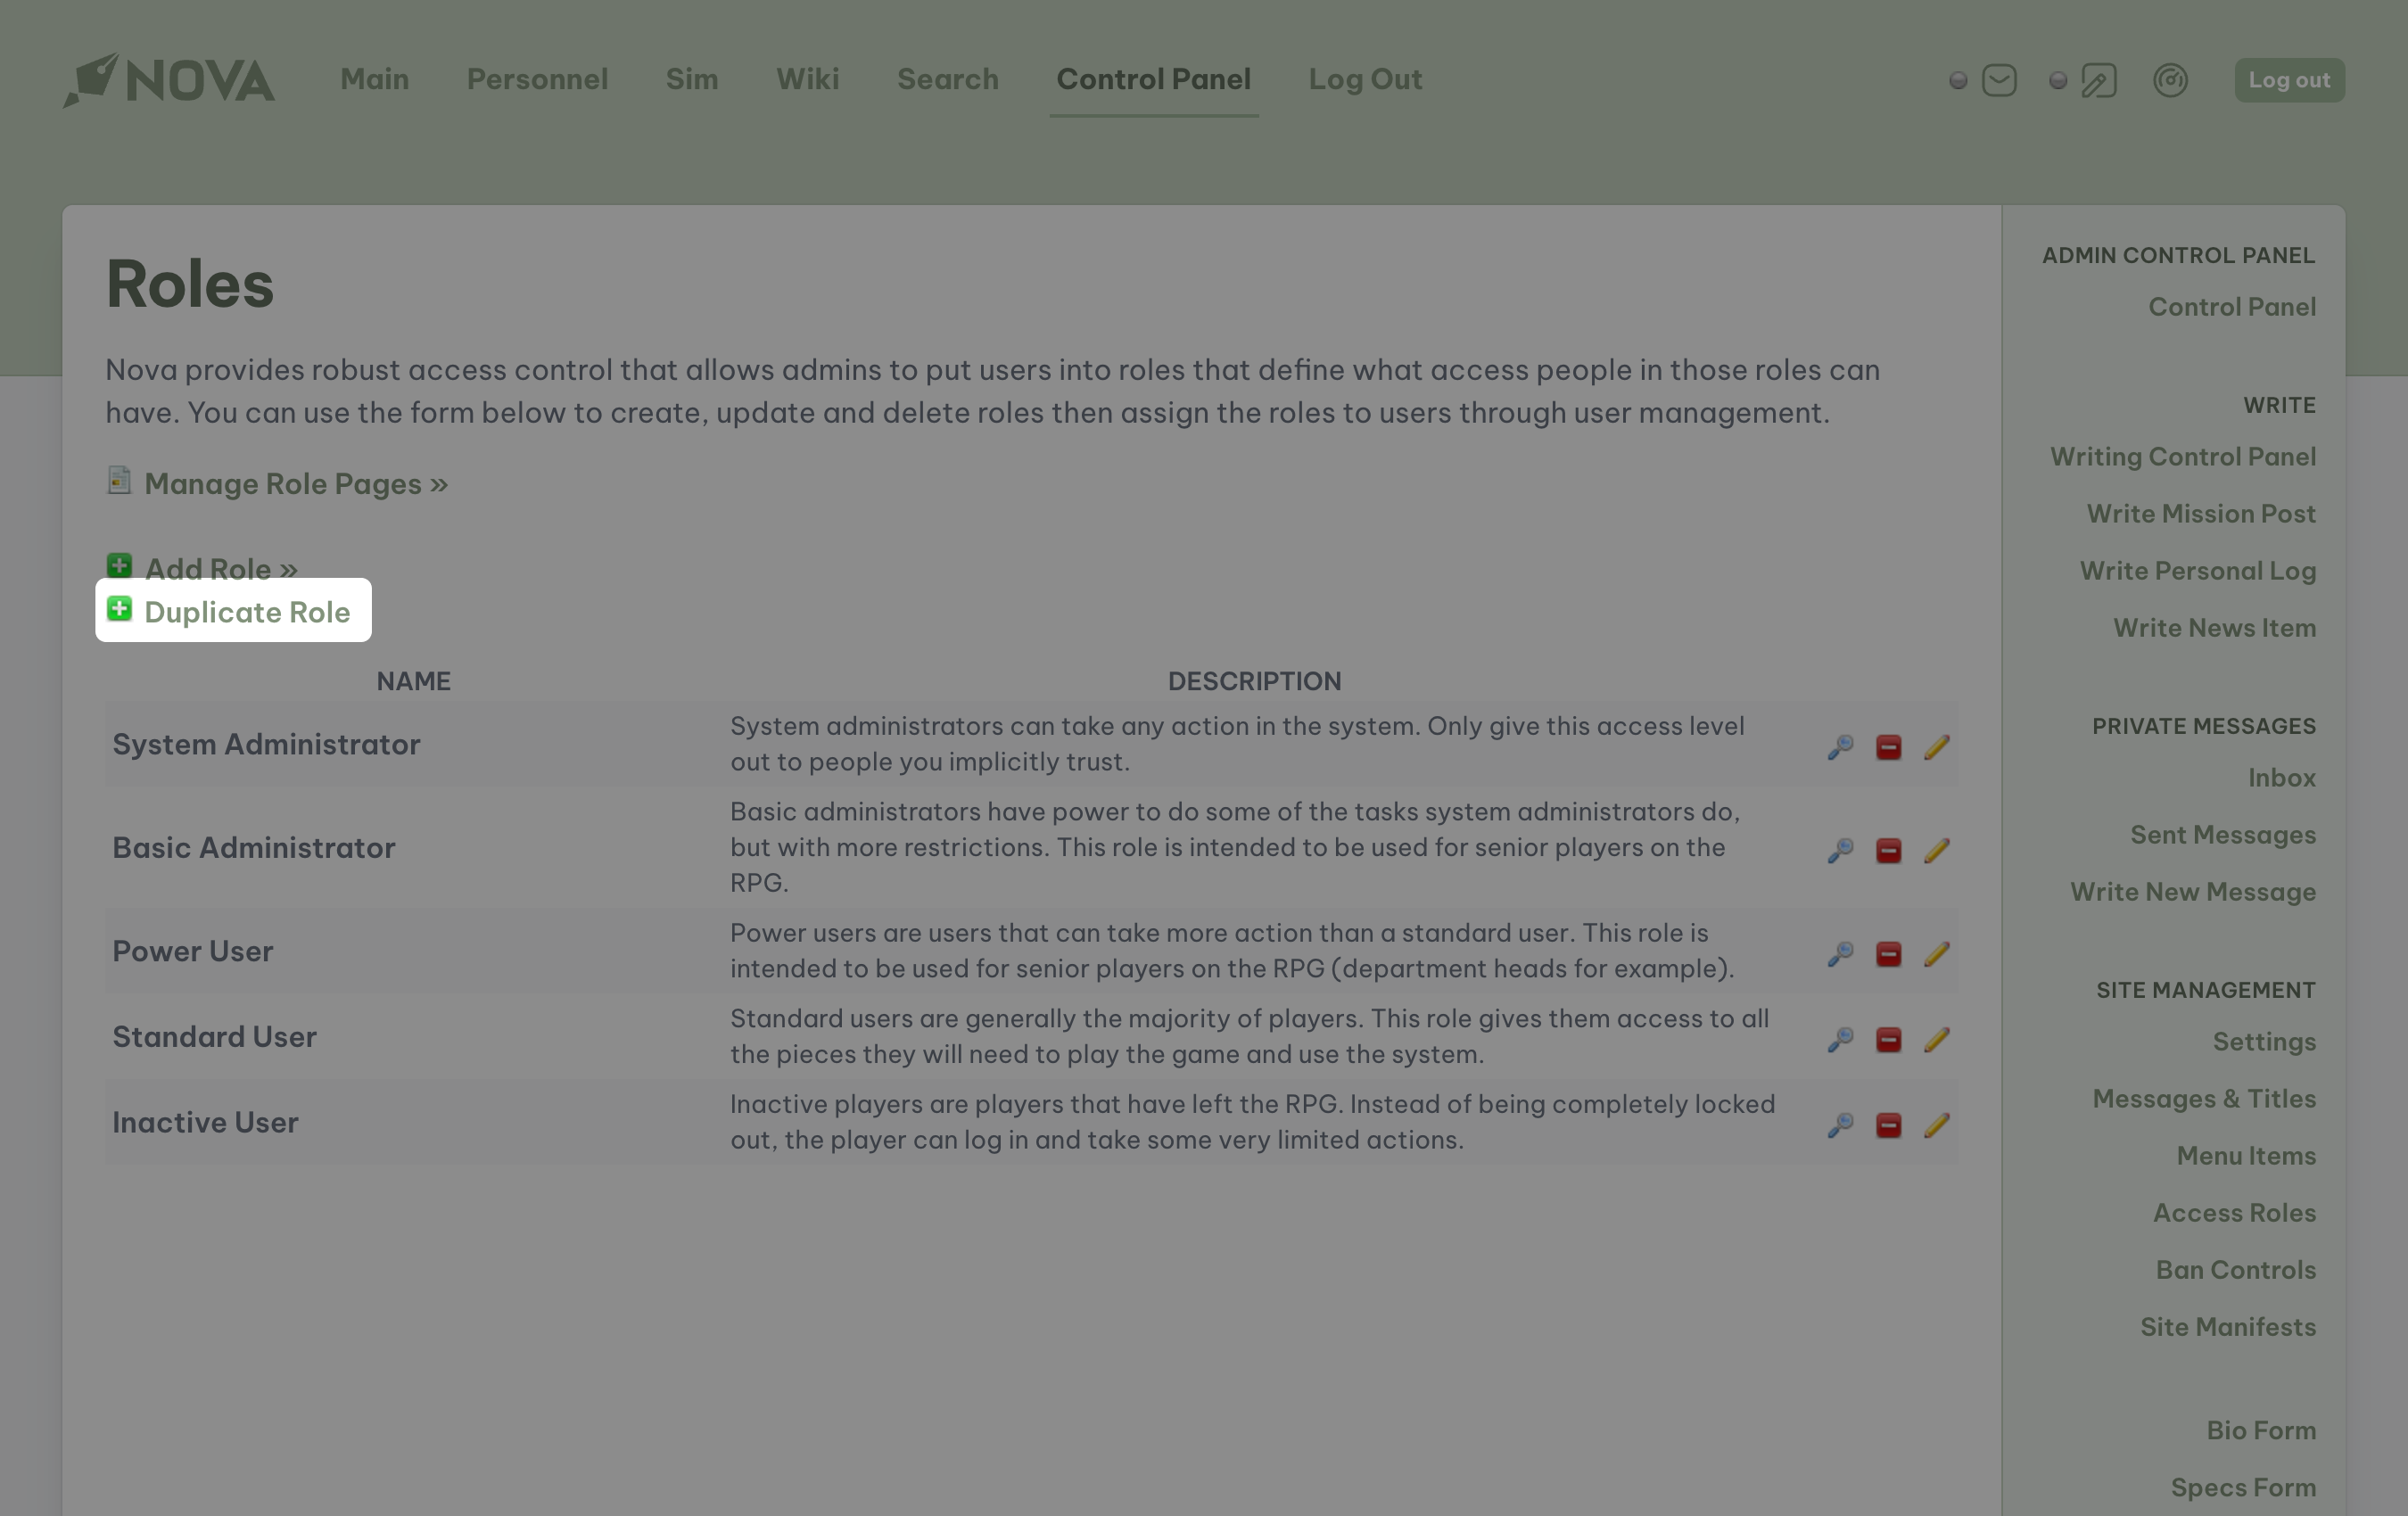
To duplicate an existing role to use as a template for a custom role, select the Duplicate Role from the top of the page. Select the role you wish to duplicate from the dropdown menu, then enter a Name and Description for the role. When you finished, click the Submit button.
Tip
Don't know what a particular permission setting will do? The Edit Role page will provide you with a brief description of what each setting will grant the user assigned to the group. To see this description, place your cursor over the appropriate question mark icon and the information will appear in a popup.
Role pages
Nova provides robost access control that includes not only all pages that come with the system by default, but can include pages that you create. For example, if you added a page, or series of pages, to Nova, you could restrict the ability to view those pages to select access roles. Each role page is tied to a specific set of permissions assigned to existing user roles.
Caution
Editing role pages could affect existing access roles and your players' ability to participate in the game. Proceed with caution.
To access the Role Pages Manager, access Nova's control panel and locate Access Roles under the subheading Site Management. Then, under the Roles heading, select Manage Role Pages.
All role pages are organized in groups, and arranged according to the presentation of permission settings on the Edit Role page.
To edit or delete an existing role page, click on the appropriate icon next to the page you wish to edit. To add a role page, select the Add Role Page option at the top of the page.
When adding or editing a role page, the following options will be available:
- Page Name: the name of the page connected to the permission set, or the name of the permission set itself (i.e. Posting Levels, NPC Management (Level 2), Manage News Categories, etc.)
- Page URL: the base URL of the page, or set of pages, that will be controlled by the permission set (i.e.
report/posting,characters/npcs,manage/newscats). - Page Level: the level of permissions available to this page. In most cases, access is granted by a level set at
0, but other sections, such as NPC Management, can be regulated by access levels from1to3. - Group: the role page group this page will be listed under on the Edit Role page.
- Description: a brief description of this role page for the hint on the Edit Role page.
When your edits are complete, select the Submit button.
Role page groups
To manage the role page groups, access the Manage Role Page Group link at the top of the Role Pages page.

From here, you will be able to edit or delete any group that already exists within Nova. Should you wish to delete a group, you will have to select a new role page group for the permission sets to be added to.
Warning
Deleting role page groups could negatively affect permission sets, the existing access roles, and your player's ability to use the Nova system and play the game. Proceed with caution.
To add a new group, select the Add Role Page Group option. Assign a name for the group, and provide a number for the listing order (ranging from 0 (top of the list) to 99 (bottom of the list)). When you are finished, click Submit.
Bans
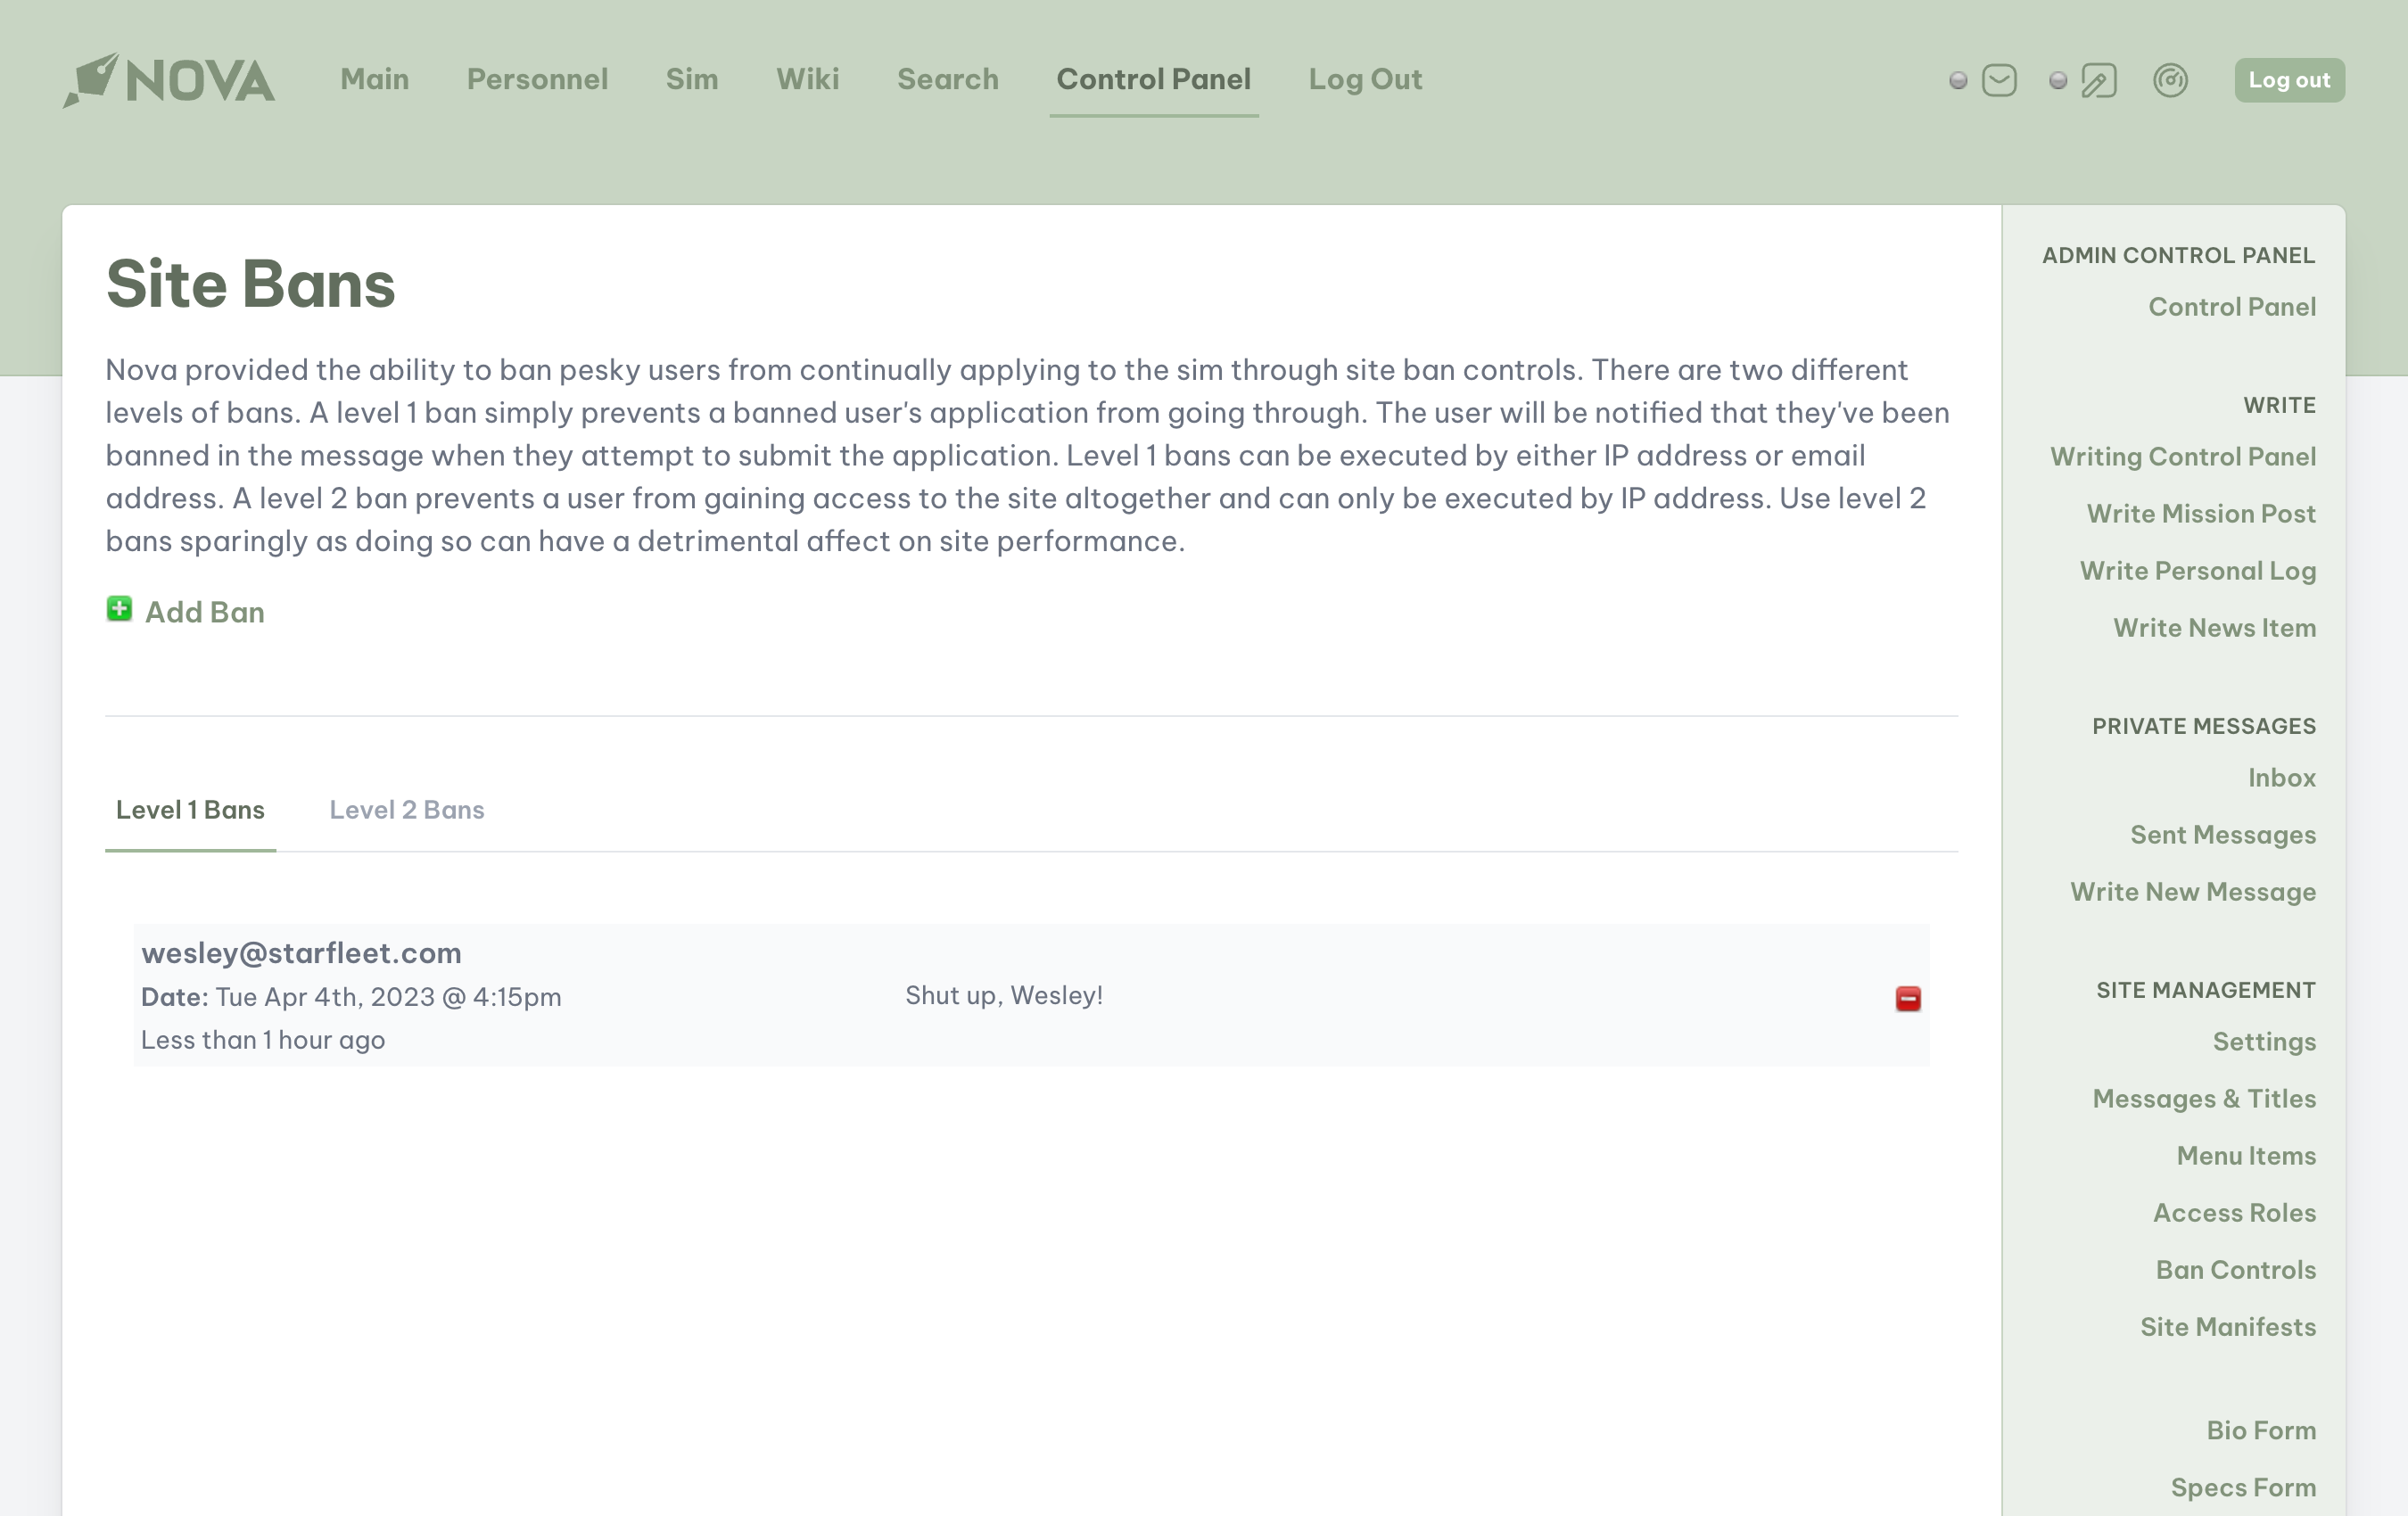
On rare occasions, you may encounter a user who causes trouble or strife within your game or is a sore point for the management team. Nova provides system administrators with the ability to keep these users from applying to the game, or even accessing their old accounts.
To access the Site Bans management system, access Nova's control panel and locate Ban Controls under the subheading Site Management.
Two types of ban levels are available within Nova:
- Level 1: can be executed by either an IP address or email address. Using this level will prevent a user from applying to the game or accessing their old account.
- Level 2: can only be executed by IP address. Using this level will prevent a user from accessing any portion of the site, even as a regular visitor.
Caution
Use level 2 bans sparingly as doing so can have an impact on site performance. If Nova is actively watching for multiple IPs, it could continually slow down the site's operations and performance for the users actively playing the game.
To add a ban, select the Add Ban option and fill out the appropriate fields:
- Ban Level: select Level 1 or Level 2.
- Email address: enter the email address of the user you wish to ban.
- IP Address: enter the user's known IP address. Only one IP Address can be entered.
- Reason: enter the reason why this user is being banned. Reasons are helpful for the management team to recall why a user was banned, especially if a discussion happens at a later date to consider repealing the ban.
When all information is entered, click on the *Add button.
Tip
If a user is known to have multiple IP addresses, you will have to place a ban for each one of those IP addresses.
You can review all existing bans under the Level 1 or Level 2 tabs available on the Site Bans page. To remove a ban, simply click on the Delete icon next to the appropriate ban.